How to install WinCE
Note: This section assumes that you have in front of the method in accordance with the USB driver installed and the development board is set to NOR flash to start the system update and installed NAND flash, please set to start, set the method please refer to previous chapters.
Instruction
The binary file of WinCE 5.0 installation is located in CD-ROM“\images\wince5.0”
The binary file of WinCE 6.0 installation is located in CD-ROM“\images\wince6.0”
The step of installing WinCE 5/6 is same except for the file selection. They are collectively named as WinCE.
- The main step of installing WinCE is
1)Install bootloader
2)Install BootLogo(fomat bmp)
3)Install WinCE kernel image
The specific procedure of installation is below:
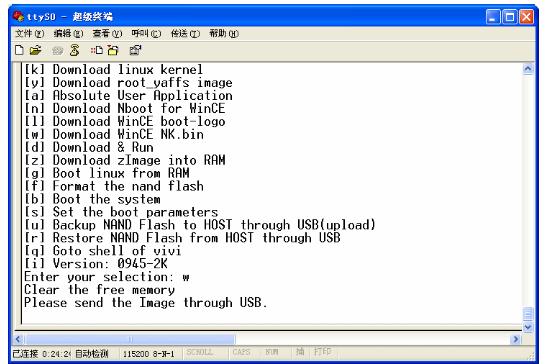
Tips: Please connect serial port , open Hyper Terminal , power the development board , enter the BIOS menu.
Install bootloader
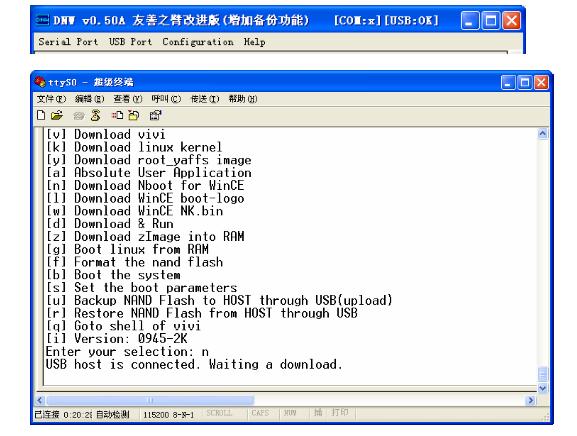
1)Open the DNW and connect the USB cable. [USB :OK] in title bar indicate the USB cable is connect successfully. Then download the Nboot.bin according to the menu selection [n].
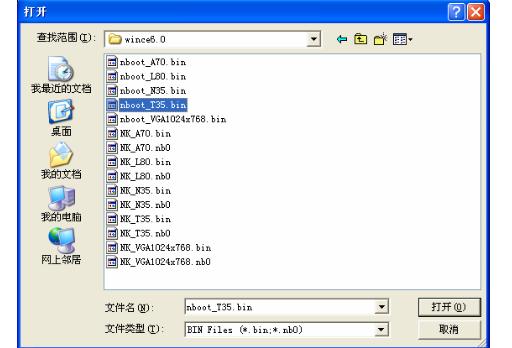
2)Select “USB Port->Transmit” and open the file Nboot.bin located in “\images\wince6.0” to download.
Bootloader descriprtion:
nboot_W35.bin – apply to 3.5” LCD landscape mode(LQ035Q1DG06 or compatible)
nboot_X35.bin –  apply to Sony 3.5" LCD
nboot_N35.bin –  apply to NEC 3.5" LCD
nboot_T35.bin –  apply to 3.5” LCD
nboot_L80.bin –  apply to Sharp 8”LCD( or compatible)
nboot_A70.bin –  apply to 7” LCD
nboot_VGA1024x768.bin – apply to VGA output, resolution 1024x768
3)After download is complete, the BIOS will burn Nboot.bin into BLOCK0 in Nand Flash automatically.
Download BootLogo
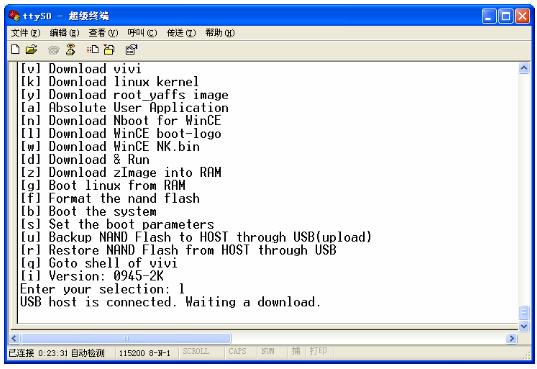
1)Select function [I] in BIOS menu and download bmp format picture for BootLogo.
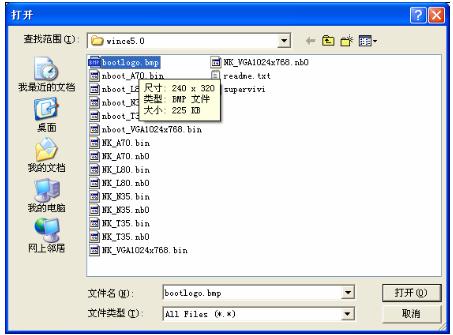
2)Click “USB Port->Transmit/Restore” in DNW and select bootlogo.bmp which is located in “images\wince6.0\bootlogo.bmp”.
3)After uploading is complete, BIOS will automatically upload bootlogo.bmp to Nand Flash and return to main menu.
Install WinCE kernel image
Description: Supervivi has integrated the function of WinCE kernel programmer. It’s unnecessary to upload other “springboard file’ such as Eboot etc. First supervivi upload NK.bin to RAM via USB cable and format Nand Flash, then creat system partition and user partition. WinCE system we provided is appropriate for 64M/128M-1Gb mini2440/micro2440, so the kernel file uploaded is same.
1)Select function [w] in BIOS menu to upload WinCE kernel.
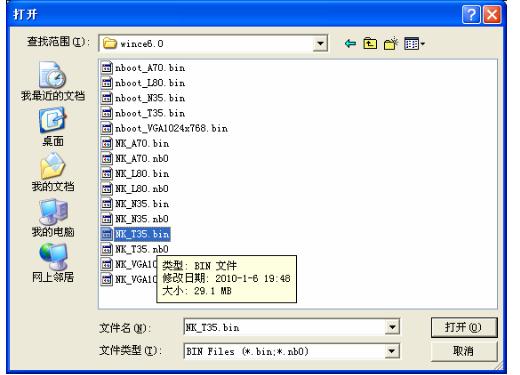
2)Click “USB Port->Transmit/Restore” in DNW and upload the WinCE kernel located in directory “\images\wince6.0”
WinCE kernel description: NK_W35.bin – apply to 3.5” LCD landscape mode(LQ035Q1DG06 or compatible) NK_X35.bin – apply to Sony 3.5" LCD NK_N35.bin – apply to NEC 3.5" LCD NK_T35.bin – apply to 3.5” LCD NK_L80.bin – apply to Sharp 8”LCD( or compatible) NK_A70.bin – apply to 7” LCD NK_VGA1024x768.bin – apply to VGA output, resolution 1024x768
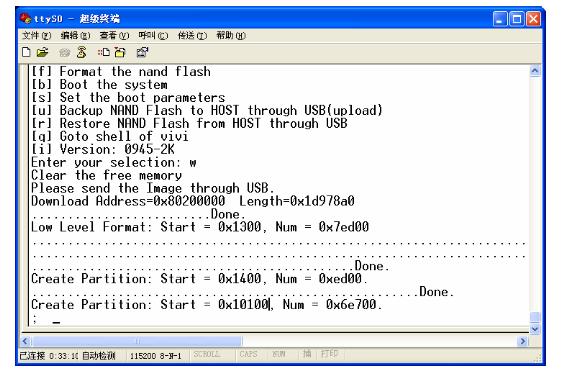
When uploading is complete, BIOS will format the Nand Flash. Then create the partition and upload the WinCE in order. When uploading is complete, the system will start automatically. Serial port message in all procedure is below.
