Mighty Board
Contents
Introduction
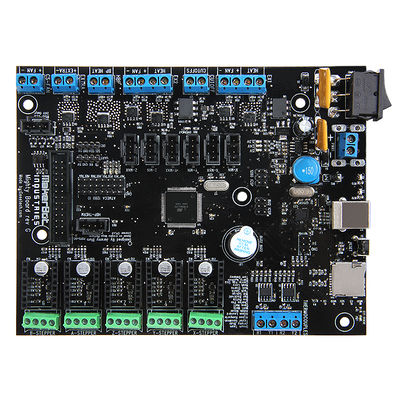
MightyBoard is a DIY Open Source 3D Printer Control Board designed by MakerBot company, it is mainly used in desktop 3D printer DIY creation. It adapts ATMEGA’s Atmega1280 as the master control chip. MightyBoard provides stable and excellent performance while reducing the difficulty of development; it is very suitable for those who enjoy DIY. What’s more, MightyBoard supports dual extruders, with the control software of MakerBot, it can realize double color printing to make printed items more attractive.
Features:
- Supports dual extruders.
- Adopts professional thermocouple temperature measurement chip, to ensure accurate temperature measurement.
- The heating module has protection function to make sure the safety of using.
- Unique RGBLED display.
- Compatible with the Arduino development environment, easy to develop further functions.
- Use active cooling in the printing process to make sure the printed items can form better.
Overview and Hardware Resources
Size: 154mm x 120mm
Weight: 130g
MightyBoard adops the Atmega1280 IC and Atmega16u2 that is completely compatible with Arduino. Stepper motor driver module can choose A4988 or DRV8825 motor driver IC, so as to adapt to the needs of different frame structure. MightyBoard uses the thermocouple temperature measurement, with MAX6675 thermocouple temperature measurement IC, to ensure the accuracy of temperature measurement.
Resources
The software programs of MightyBoard are provided by the MakerBot Company. MightyBoard can be used as the host computer control software of the Replicator G. Replicator G can not only control MightyBoard to printer,but also can upgrade MightyBoard’s firmware through the serial ports, so you have no need to find the corresponding engineering documents.
Software:ReplicatorG-0040-Installer
Firmware:MightyBoard Firmware-master
Interfaces
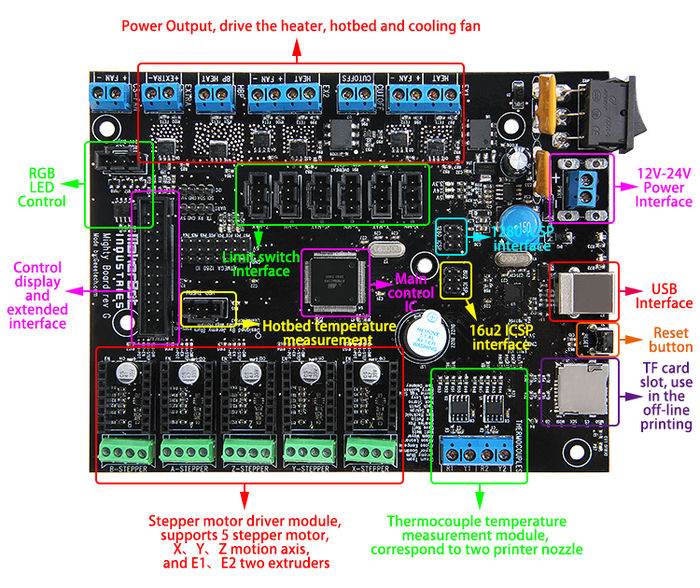
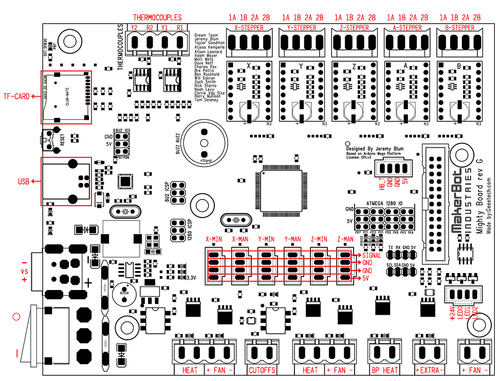
Interface Layout
Note: The display and extended interface of MightyBoard only support MightyBoard LCD2004 control panel. If you want to use other equipments, you should develop the corresponding program.
Development Environment setting
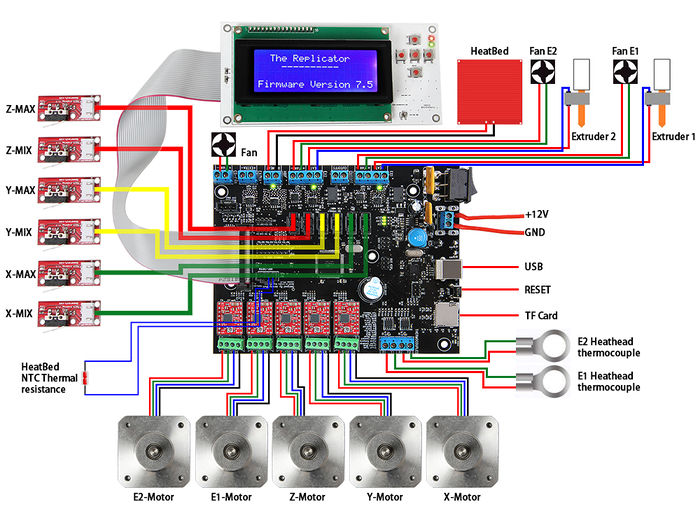
Interface Connecting and Setting
Signal polarity scheme of interfaces
File Burning
Here we will upload firmware to MightyBoard with Replicator G as an example.
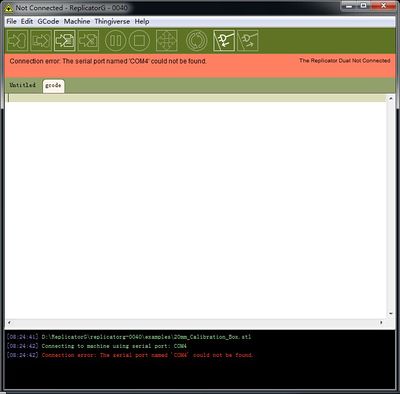
1.Open Replicator G(Replicator-0040 for Windows) ![]()
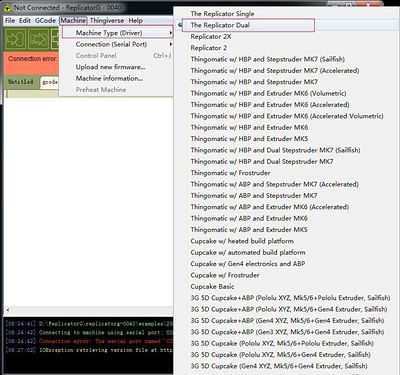
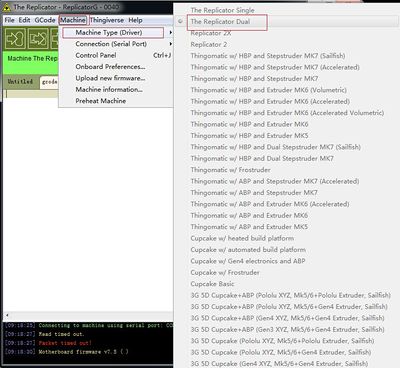
2.Click “Machine”, choose the type of printer: The Replicator Dual, as follow,
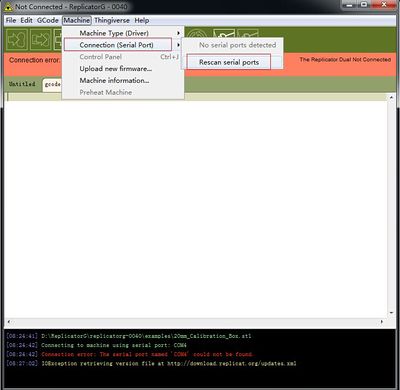
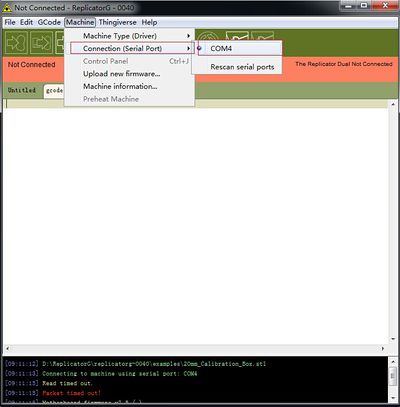
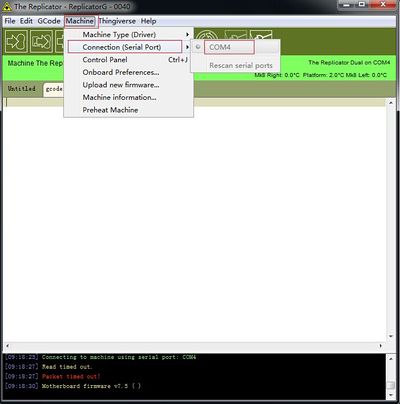
3.Click “Machine”, choose “Connection (Serial Port)”.
If you can’t find the serial port, click “Rescan Serial Ports” (. If you still can't find a serial port, please disconnect the USB, then reconnect it, and restart the software. If you find the serial port, select the COM port corresponding to your board.
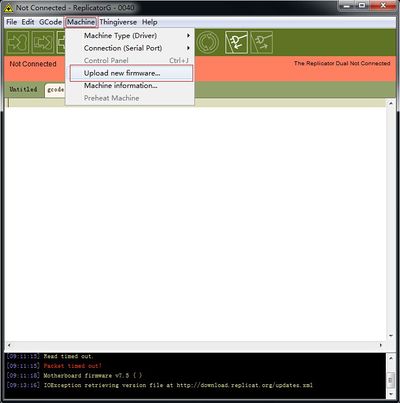
4.Click “Machine”, choose “upload new firmware”.
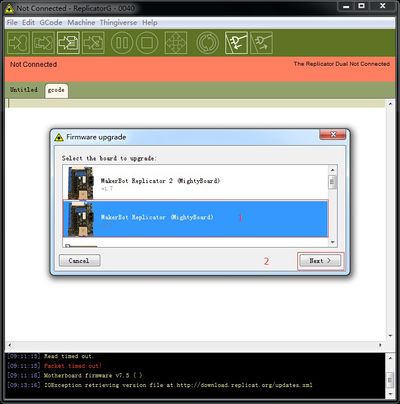
Click “MakeBot Replicator (MightyBoard) v1.5” and click Next to continue.
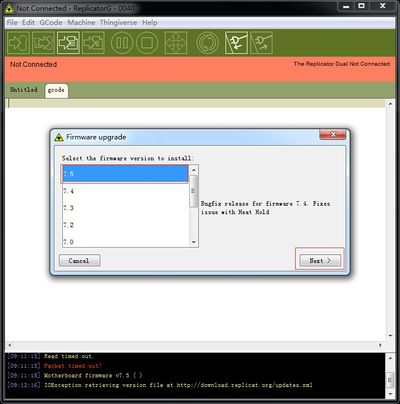
5.Choose “7.5” and then click Next.
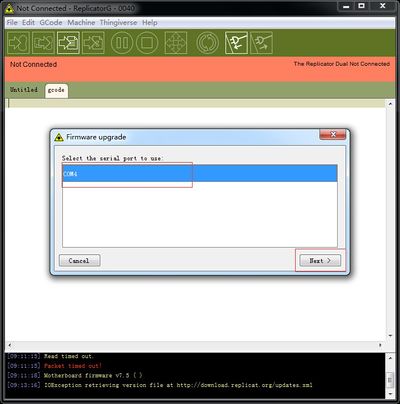
6.Choose COM port and then click Next.
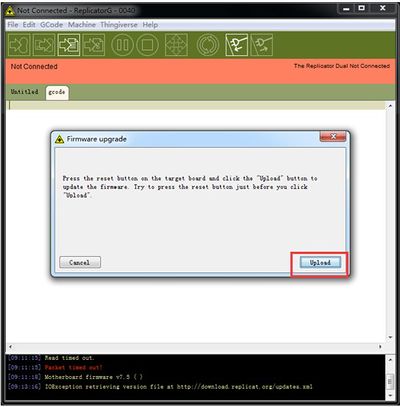
7.Click “Upload”.
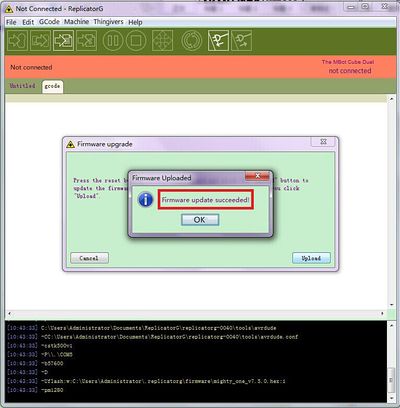
8.In the process of uploading, “TX” LED will blink, and then “RX”LED will blink. When the two LEDs stopped blinking, the firmware update succeeded.
Software Setting
1.After Startup, MightyBoard provides four kinds of operation, “Build from SD”、“Preheat”、“Utiliities” and “Info and Settings”.
“Build from SD” to print the files on the SD or TF card.
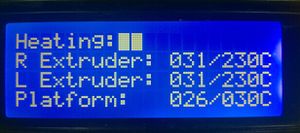
“Preheat” to preheating printer nozzle and hotbed, used when changing filament, cleaning extruder and calibrating the temperature.
“Utiliities” to manually control the direction of X, Y, Z axes, make the printer nozzle back to the origin and calibrate the relative position between the print platform and printer nozzle.
“Info and Settings” to check the version of software, set the preheating temperature, restore factory settings, and view the duration of operating.
Print instructions: first print a 20mm x 20mm cube as an example, use USB cable to connect motherboard and computer, open Replicator G, choose “Machine”→“Machine Type(driver)”→“The Replicator Dual”.
2.Then choose “Machine”→ “Connection (serial port)” and choose the corresponding port to connect.
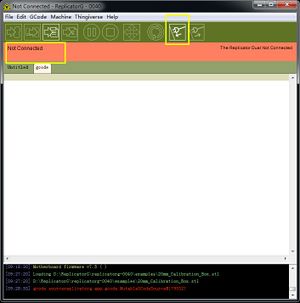
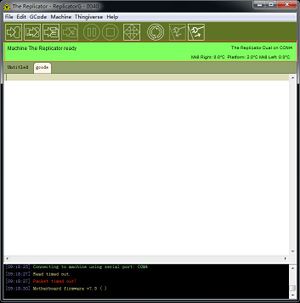
3.Click the tab in the yellow frame to connect,(left) if the connection is successful, the red bar will turn green. (right)
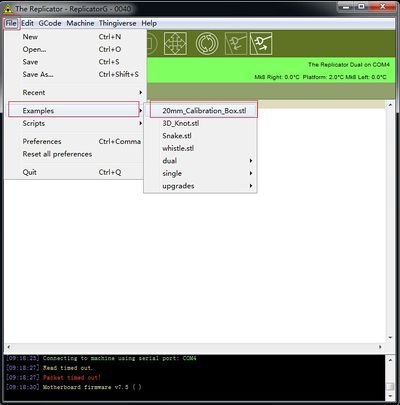
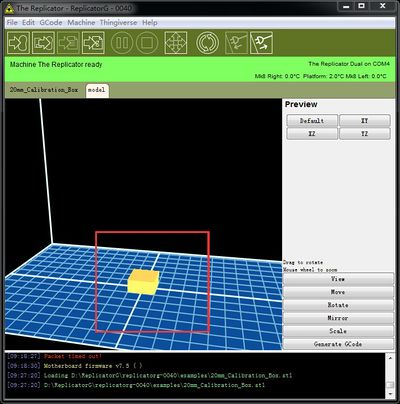
4.Choose “File” → “Examples” → “20mm_Calibration_Box.stl”, (3-17) and then the console pannel appears the cube.
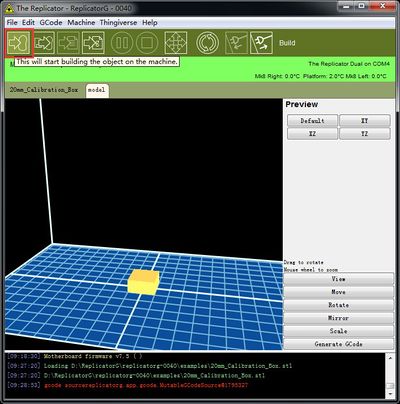
5.Click the tab in the red frame to start printing, and then wait for the finish of printing.
FAQS
Q: The computer can’t detect the motherboard after connecting? A:Check the connection status of USB port, and check whether the drive is installed successfully or not.
Q: Can’t upgrade firmware? A: Check whether the computer has connected to the motherboard successfully, and whether computer has recognized the COM of the motherboard or not.
How to buy
Click here to get: http://www.geeetech.com/reprap-mightyboard-p-885.html

