How to printer with dual extruders
From Geeetech Wiki
Revision as of 09:25, 6 July 2015 by Admin (talk | contribs) (Created page with "Before reading this text,please make sure you have already read the set up guide of the version of 13B single extruder and you can use it to print 3D models. If not, please ...")
Before reading this text,please make sure you have already read the set up guide of the version of 13B single extruder and you can use it to print 3D models. If not, please learn how to operate the single extruder. Of course, you can take this one as the single extruder version to start.
Contents
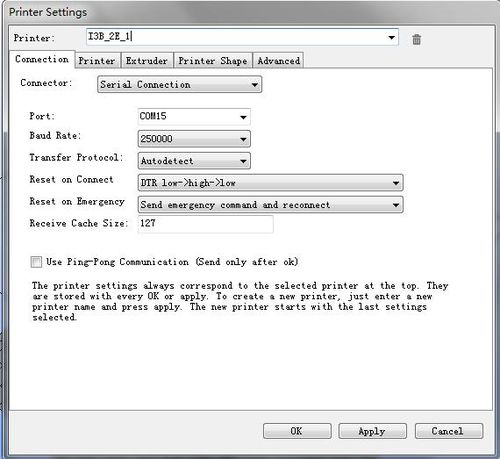
Step 1:Open Repetier Host,click Config/Printer Settings to set up the connection.
1. Name your printer.
2. Select the corresponding COM port and baud rate. Baud rate is generally 115200 or250000.
3. If you are not sure about the COM port, you can check it in your device menager.
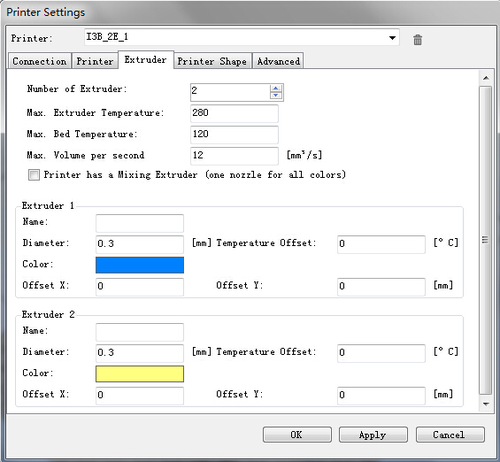
Step 2: Set up your extruder
1.Choose the number of extruder, here we choose 2.
2.Set up the diameter and color of filament
3.Offset X/Y refers to the distance between the two extruders,which can be adjusted based on real situations. You can leave it alone now.
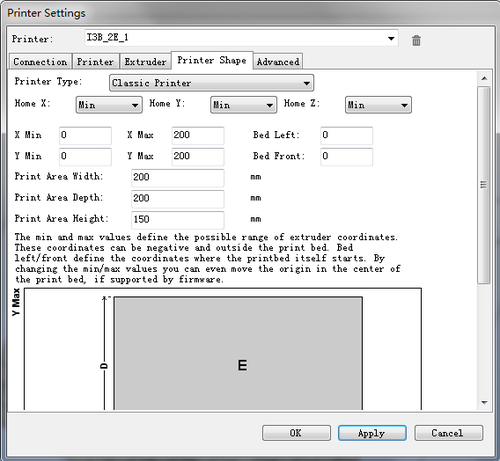
Step 3: Set up the shape of printer
Choose Classic printer as the printer type.
Home X: min Home Y: min Home Z: min
Print height: 150
Now,you can click the Connect button on the left corner to check whether it can connect with your printer. If it fails, please recheck the COM port and Baud rate.


