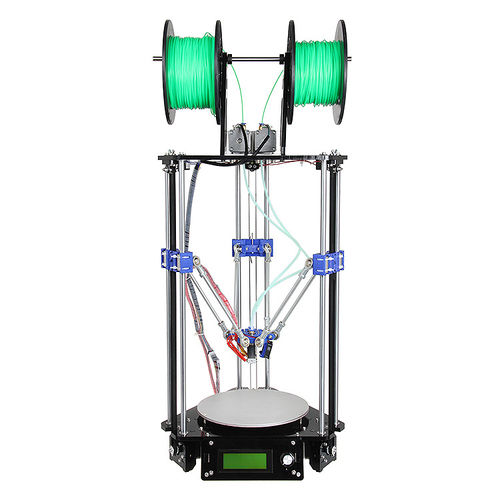
Delta Rostock mini G2s
This Rostock mini G2s is a companion piece of our new upgraded delta 3D printer -Rostock mini G2. G2s is designed to support dual extruder.
With G2s you can print a single two-color object, or you can print two objects in one print job, each made from a different color. You can also print one single-color object, as with other single-extruder 3D printers. Or you can use one extruder for infill or support. The 2 extruder motor pushes filament through 2 head separately, so mixing colors printing is not applicable for the moment.
This G2s is powered by our newly designed control system—GT2560 that supports 2 extruders and eliminates the complicated wiring of Mega2560+Ramps 1.4 and it is more space-saving.
An auto-leveling auto-calibration device is also added on G2; which means you do not have to adjust it every time before you start printing, after the first assembly work, you can almost plug and play.
In terms of printing filament, G2s not only support PLA and ABS, Nylon and wood filament is also available, which enables more possibilities to create 3D printing project.
This G2s is also improved with LCD control panel; you can monitor the printing process in real time and with a SD card it can realize stand-alone printing, very convenient.
Contents
Main features:
1. With dual extruder, support multiple way of printing.
2. Support PLA, ABS, Nylon and Wood, giving more possibilities to create 3D printing project.
3. New updated control system.
4. Auto-leveling and auto-calibration.
5. More flexible effectors and diagonal rods.
6. More fluent printing process and higher precession.
Specifications:
Print Volume: 170 x 200mm
Chassis: laser -cut acrylic plate
The Layer Thickness: 0.1mm
Layer Resolution: 0.1mm
Filament Diameter: 1.75, 0.3mm
Nozzle Diameter: 0.3, 0.35, 0.4, 0.5mm
Print Speed: 60 to 120 mm/sec
Print Plate Size: 210 x 3mm
Print Plate (Build Platform): aluminum plate + heatbed
XYZ Bearings: carbon steel
Stepper Motors: 1.8° step angle with 1/16 micro-stepping
Max Heated Bed Temp: about 110 ℃
Max Extruder Temp: about 240 ℃
AC Input: 115V/1.5A 230V/0.75A
Output:DC12V/0-15A
No. of Extruders: 2
Connectivity (Interface): USB, SD Card
Electronics: GT2560
3D printing Software: Repetier Host
CAD Input data file format supported: STL, G code
Client Operating System: Windows, Linux, Mac
Machine Dimensions: 320 x 320 x 870mm
Machine weight:9kg
Shipping box dimensions:495*395*195mm
Shipping box weight:10kg
Building instruction
Delta Rostock mini G2& G2s building instruction
Verify code
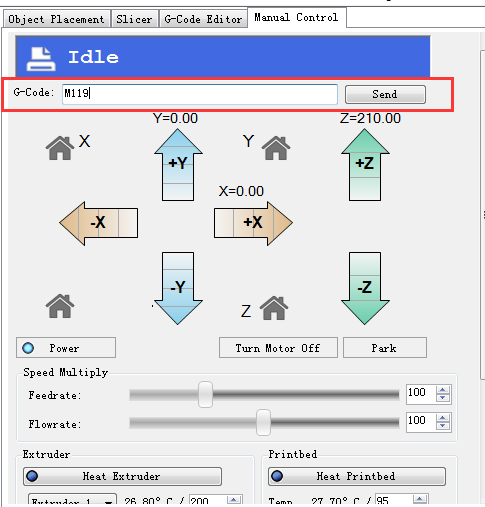
1. verify the endstop Before you risk any damage, you should test if you have configured the z-probe correctly. Send the command M119 to verify the endstop first.
You can see the following message
* x_max,y_max,z_max is for the endstop:
if the endstop is triggered, the feedback is Triggered;
If the endstop is not triggered, the feedback is Open.
z_min is for the probe:
When probe is put down, the feedback is Open;
When probe is hooked up, the feedback is Triggered;
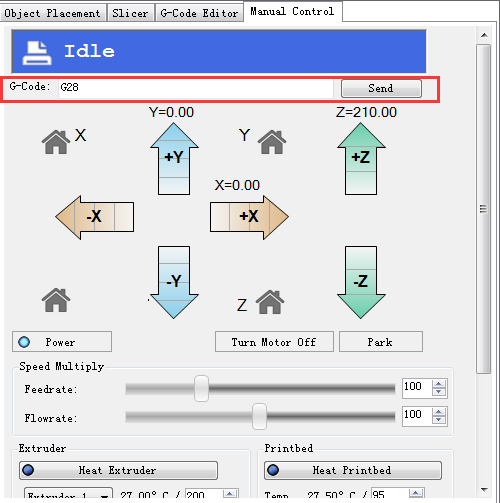
2. Verify Homing Send G28 or click the home icon to homing the printer.
You will see the X/Y/Z raise up till they hit the endstops. Then they will move down a bit and hit the endstops again before they stop (that is to increase the printing precision).
Trouble shooting:
The axis did not stop after hitting the endstops.
Please check if the wire connection of the endstops of X/Y/Z axis matches.
Note: unlike other machines, the origin here is not (0,0,0) but (0,0,MANUAL_Z_HOME_POS)
3. Get the present coordinates
Send M114 command to get the present coordinates after homing, you can get
 fw(0,0,MANUAL_Z_HOME_POS)
 MANUAL_Z_HOME_POS
This is the distance between nozzle and print surface after homing.
Calibration of auto-leveling
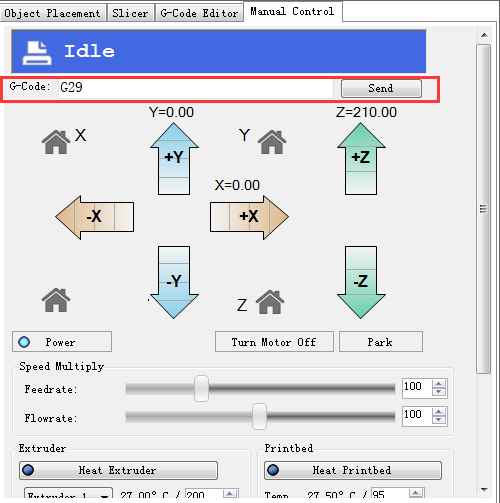
Auto-leveling probe is controlled by G29 command. As this is a DIY 3d printer, you may need to help it complete the leveling:
1.You need to put down the auto-leveling probe manualy.
2.Send G29 command.
3.auto-leveling probe will probe the 3 pre-setted probing points. After probing, the print head will raise up a bit and stop.
4.Hook up the probe manualy.
as this calibration needs to be done several time before you can start printing, you can refer to this guide.
1.Manualy put down the probe, then send M119 command to check if the Z-min is open.
2.Send G28 command to auto home the printer.
3.Send G29 command to start the auto-leveling. *there might be collisions, please always be ready to cut off the power supply.
4.After sending G29, the printing head will move down, and hit the probe point setted, after the probing, the printing head will go up.
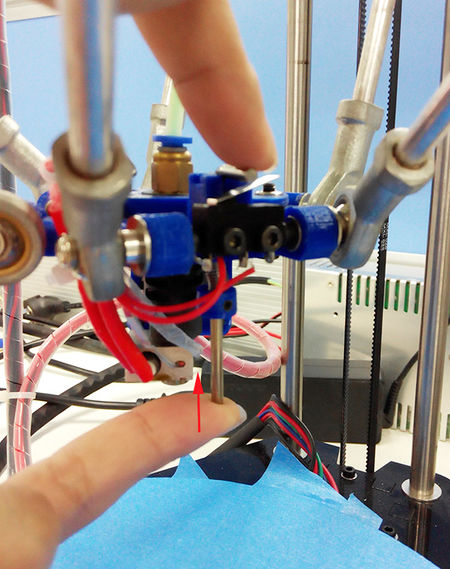
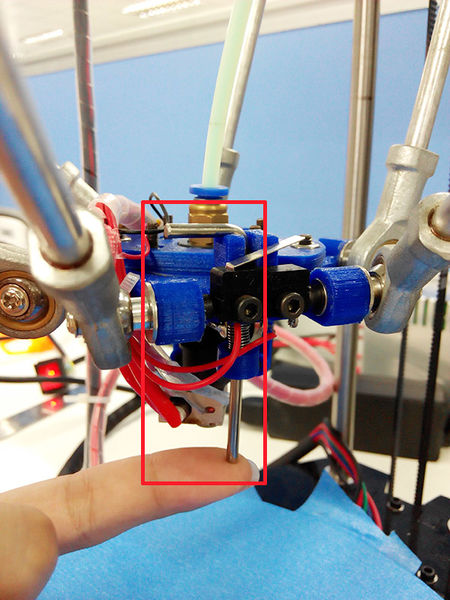
5.After the leveling, the printing head will raise up and stop, meaning the leveling is finished. You should have the probe back (as the spring on the probe is a bit tight, to make it easier, you can use your finger to push up the probe).
6.Send G1X0 Y0 command to move the printing head to(0,0).
7.Click -Z icon on manual control to move the print head down until it touches the print bed just enough. Send M114 command to get the present coordinates. If the coordinate is (0,0,0), the auto-leveling is successful. If not, you need to modify the Z_PROBE_OFFSET_FROM_EXTRUDER , e.g. Reduce -0.3 to -0.5, and then re-upload the firmware and test again.
8.You may have to test it for more than once, but for the sake of better printing object,please be patient.
9.Once auto-leveling is set up, Hook up the probe manualy. Then you can print your first prints.
