Difference between revisions of "Micro2440‘s settings and connections"
(Created page with "Micro2440 development board’s settings and connections == Note == We have installed Linux system which includes three files in accordance with supervivi, zImage_t35/x35/w35...") |
(No difference)
|
Revision as of 02:02, 6 July 2012
Micro2440 development board’s settings and connections
Note
We have installed Linux system which includes three files in accordance with supervivi, zImage_t35/x35/w35 and rootfs-qtopia-qt4.img in CD-ROM by default if the customer didn’t specify which system to be installed.
The operation below is based on WinXP environment. Supervivi-64M included in CD-ROM should be applied to 64M Micro2440, supervivi-128M should be applied to 128M/256M/512M/1GB Micro2440.
External connection
- Please use the direct serial port cable we provide to connect serial port 0 on Micro2440 with PC serial port.
- Please use the crossed network cable we provide to connect network interface on Micro2440 with PC
- Please use the 5V power adapter we provide to connect the power jack on Micro2440
- Please plug the headphone or speaker jack in the audio output socket (green).
- If you have a LCD display, please connect it to LCD interface on Micro2440 following the direct of the dataline.
- Please use USB cable to connect Micro2440 with PC.
Startup mode selection
The startup mode of Micro2440 is chosen by toggle switch S2.
S2 is toggled to Nor Flash, the system will boot from Nor Flash.
S2 is toggled to Nand Flash, the system will boot from Nand Flash.
Hyper terminal setting
Note: Some customers use USB-RS232 cable to expand Serial port, please note that a few USB-RS232 cables will result in error code because of its poor quality. Our customers could contact with our sales agents to buy the cable available they provide.
In addition, please make sure to use the accessory direct serial port cable, perhaps other cable may not work.
We must use a terminal application or similar to communicate with development board via serial port. The HyperTerminal included with Windows XP is in common use. Usually the Linux for desktop also carry the similar serial terminal application called minicom based on the command line.
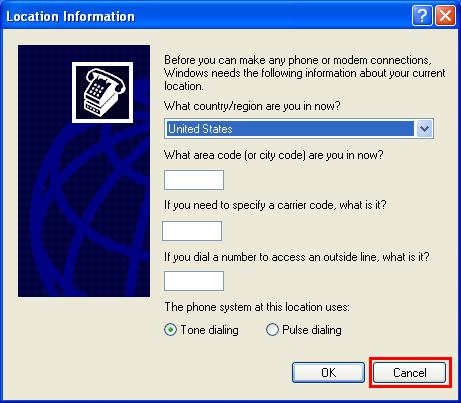
Here we focus on the HyperTerminal included with Windows XP. HyperTerminal is usually located in “Start>Programs>Accessories>Communications”. Run this application, then the following dialog box appears, click “Cancel”.
Next click “Yes” in the popup window.
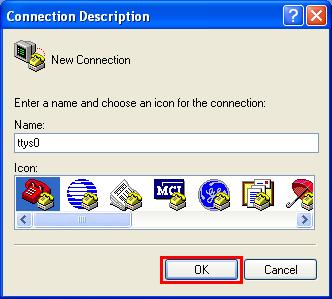
HyperTerminal will ask you to name the new connection and we name it “ttys0”, Windows XP prohibit you from naming it “COM1” or similar due to the name has been occupied by system.
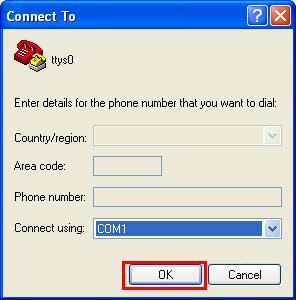
After that another dialog box pop up again, you need to specify the serial port of the development board and we specify “COM1” as shown.
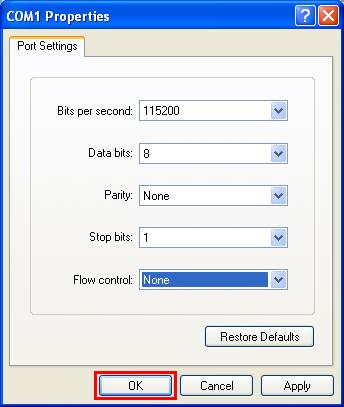
Finally, the most important thing is to set serial port. Note that the Flow control must be specified as none, or you will see the data output and no data input. The serial baud rate must set at 115200.
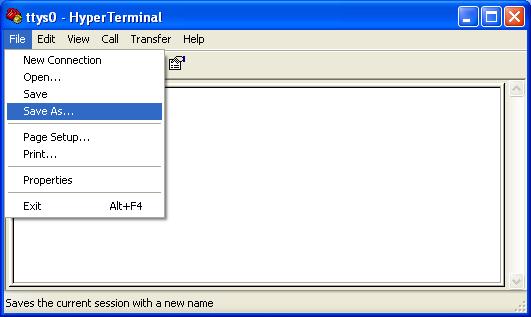
After all setting is complete, switch on the power supply and the HyperTerminal shows the vivi startup, then select ”File>Save as” in HyperTerminal to save the connection settings so as to use it next time.
