Difference between revisions of "6-Channel Relay module"
From Geeetech Wiki
(→Pin definition) |
(→Introduction) |
||
| Line 1: | Line 1: | ||
==Introduction== | ==Introduction== | ||
| − | [[File:Relay 6.jpg| | + | [[File:Relay 6.jpg|350px]] |
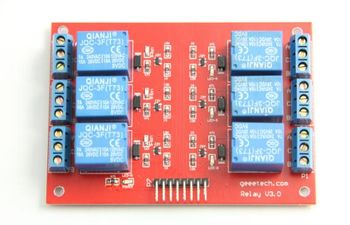
The Arduino Relay module allows a wide range of microcontroller such as Arduino, AVR ,PIC, ARM with digital outputs to control larger loads and devices like AC or DC Motors, electromagnets, solenoids, and incandescent light bulbs. This module is designed to be integrated with 6 relays that it is capable of control 6 relays.The relay shield use one QIANJI JQC-3F high-quality relay with rated load 7A/240VAC,10A/125VAC,10A/28VDC.The relay output state is individually indicated by a light-emitting diode. | The Arduino Relay module allows a wide range of microcontroller such as Arduino, AVR ,PIC, ARM with digital outputs to control larger loads and devices like AC or DC Motors, electromagnets, solenoids, and incandescent light bulbs. This module is designed to be integrated with 6 relays that it is capable of control 6 relays.The relay shield use one QIANJI JQC-3F high-quality relay with rated load 7A/240VAC,10A/125VAC,10A/28VDC.The relay output state is individually indicated by a light-emitting diode. | ||
Revision as of 02:58, 17 May 2012
Introduction
The Arduino Relay module allows a wide range of microcontroller such as Arduino, AVR ,PIC, ARM with digital outputs to control larger loads and devices like AC or DC Motors, electromagnets, solenoids, and incandescent light bulbs. This module is designed to be integrated with 6 relays that it is capable of control 6 relays.The relay shield use one QIANJI JQC-3F high-quality relay with rated load 7A/240VAC,10A/125VAC,10A/28VDC.The relay output state is individually indicated by a light-emitting diode.
Features
- Number of Relays: 6
- Control signal: TTL level
- Rated load: 7A/240VAC 10A/125VAC 10A/28VDC
- Contact action time: 10ms/5ms
Pin definition
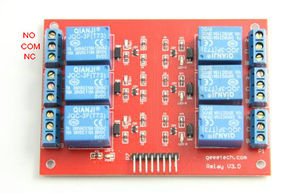
- COM- Common pin
- NC- Normally Closed, in which case NC is connected with COM when INT1 is set low and disconnected when INT1 is high;
- NO- Normally Open, in which case NO is disconnected with COM1 when INT1 is set low and connected when INT1 is high.
Terminal 2-6 is similar to terminal 1,except that the control port is INT2-6
- INT 1-6: Relay 1-6 control port
Usage
Example code
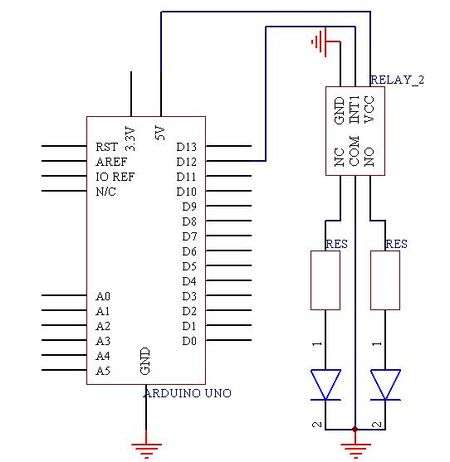
int Relay = 12;
void setup()
{
 pinMode(Relay, OUTPUT);     //Set Pin12 as output
}
void loop()
{
         digitalWrite(Relay, HIGH);   //Turn off relay
         delay(2000);
         digitalWrite(Relay, LOW);    //Turn on relay
         delay(2000);
}
How to buy
Click here to buy [6-Channel Relay module]


