Difference between revisions of "3D Touch"
| Line 39: | Line 39: | ||
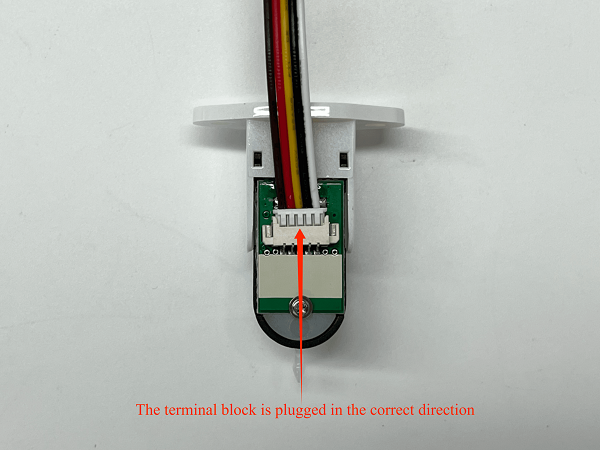
(1). Check whether the direction of the power cord is plugged in correctly, and the line sequence of the machine should be consistent with 3DTOUCH | (1). Check whether the direction of the power cord is plugged in correctly, and the line sequence of the machine should be consistent with 3DTOUCH | ||
| + | |||
| + | [[File:New_3D Touch_1.png]] | ||
(2). Whether the power cord is disconnected | (2). Whether the power cord is disconnected | ||
(3). Whether the terminal block is plugged correctly | (3). Whether the terminal block is plugged correctly | ||
| − | |||
| − | |||
[[File:New_3D Touch_2.png]] | [[File:New_3D Touch_2.png]] | ||
| Line 54: | Line 54: | ||
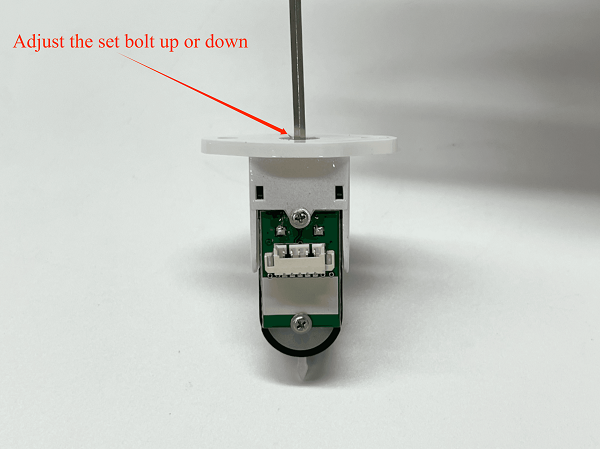
(1). Check whether the fastening bolts are locked in place, and adjust the fastening bolts up and down appropriately | (1). Check whether the fastening bolts are locked in place, and adjust the fastening bolts up and down appropriately | ||
| + | |||
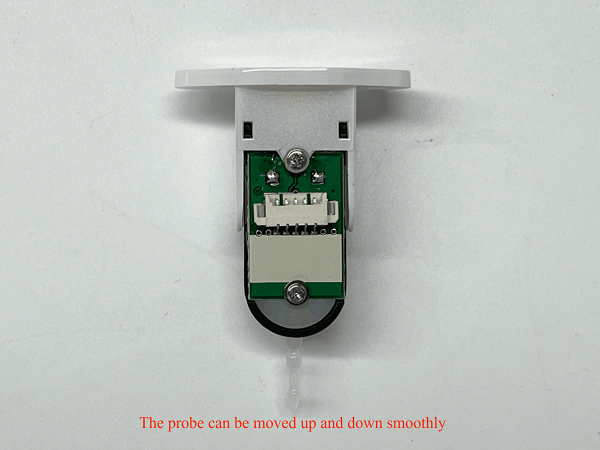
| + | [[File:New_3D Touch_3.png]] | ||
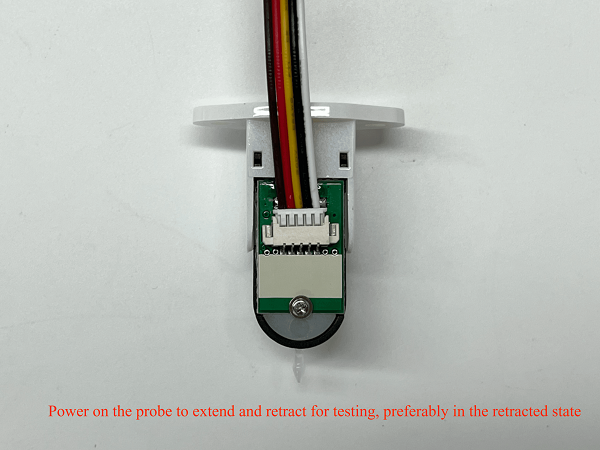
(2). When powering on, the probe should jump up and down, and finally retract, and the probe will be smoothly discharged | (2). When powering on, the probe should jump up and down, and finally retract, and the probe will be smoothly discharged | ||
| − | |||
| − | |||
| − | |||
| − | |||
[[File:New_3D Touch_4.png]] | [[File:New_3D Touch_4.png]] | ||
| + | [[File:New_3D Touch_5.png]] | ||
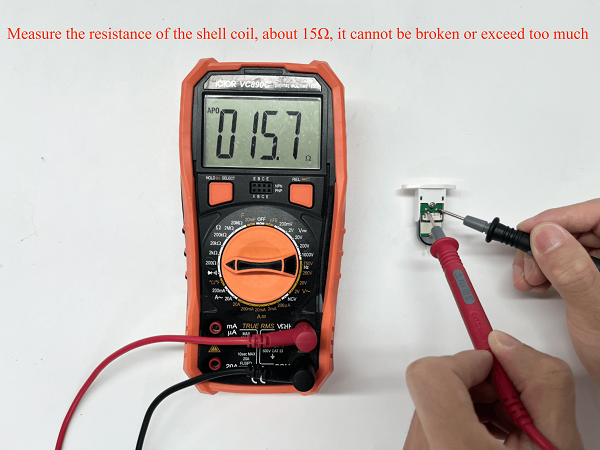
| − | + | (3). Check whether the coil resistance is correct and cannot be broken | |
[[File:New_3D Touch_6.png]] | [[File:New_3D Touch_6.png]] | ||
Latest revision as of 09:44, 4 March 2025
Warnning
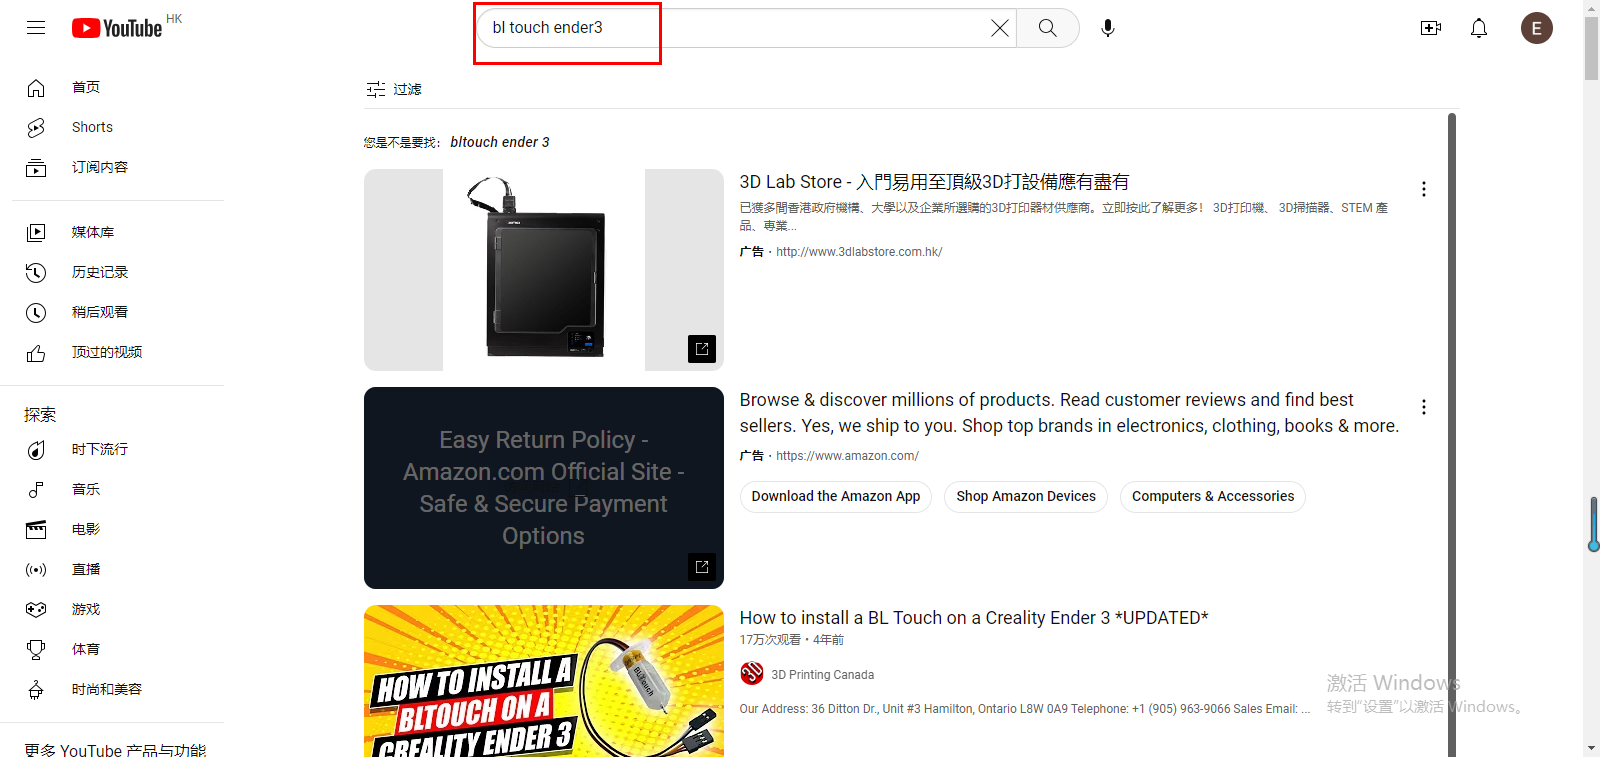
1.3D TOUCH is a standard feature, and if you want to know if 3D TOUCH is compatible with your machine, you'll need to ask your machine's technical support. If they don't know the wiring information, you can search for BL TOUCH plus your machine on youtube, as shown below in the example of ender3. https://www.youtube.com/results?search_query=bl+touch+ender3
 2.Our company's A10, A20 and A30 series can use 3D TOUCH, I3 series is not suitable for 3D TOUCH.
Installation tutorial
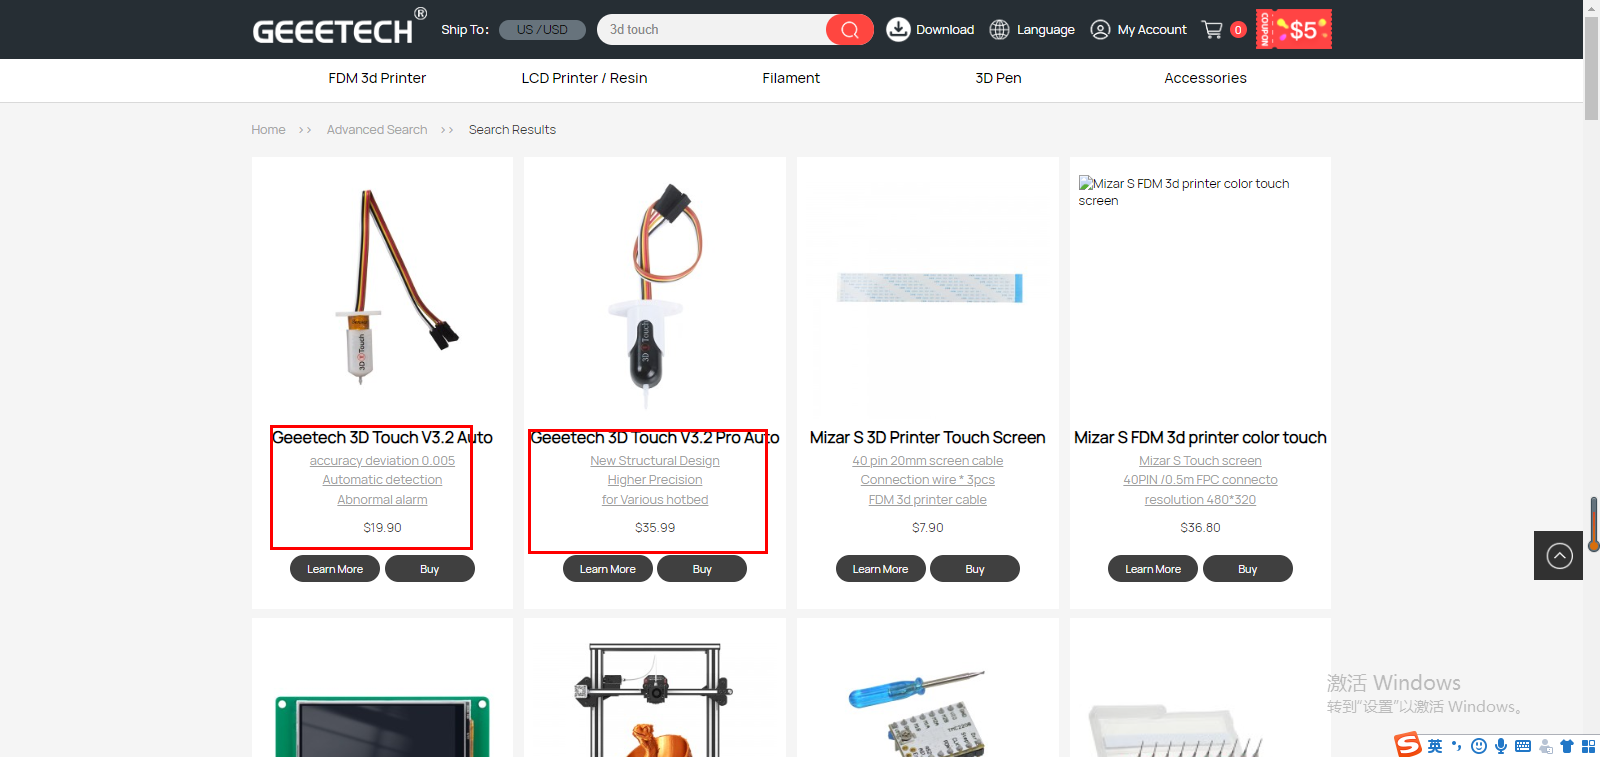
1.Check whether the assembly parts of 3D TOUCH are complete. https://www.geeetech.com/index.php?main_page=advanced_search_result&search_section=products&search_in_description=0&keyword=3d+touch&submit=
 2. Please click the link below and follow the video tutorial to install 3D TOUCH.
https://www.youtube.com/@geeetech3dprinting/search?query=3d%20touch
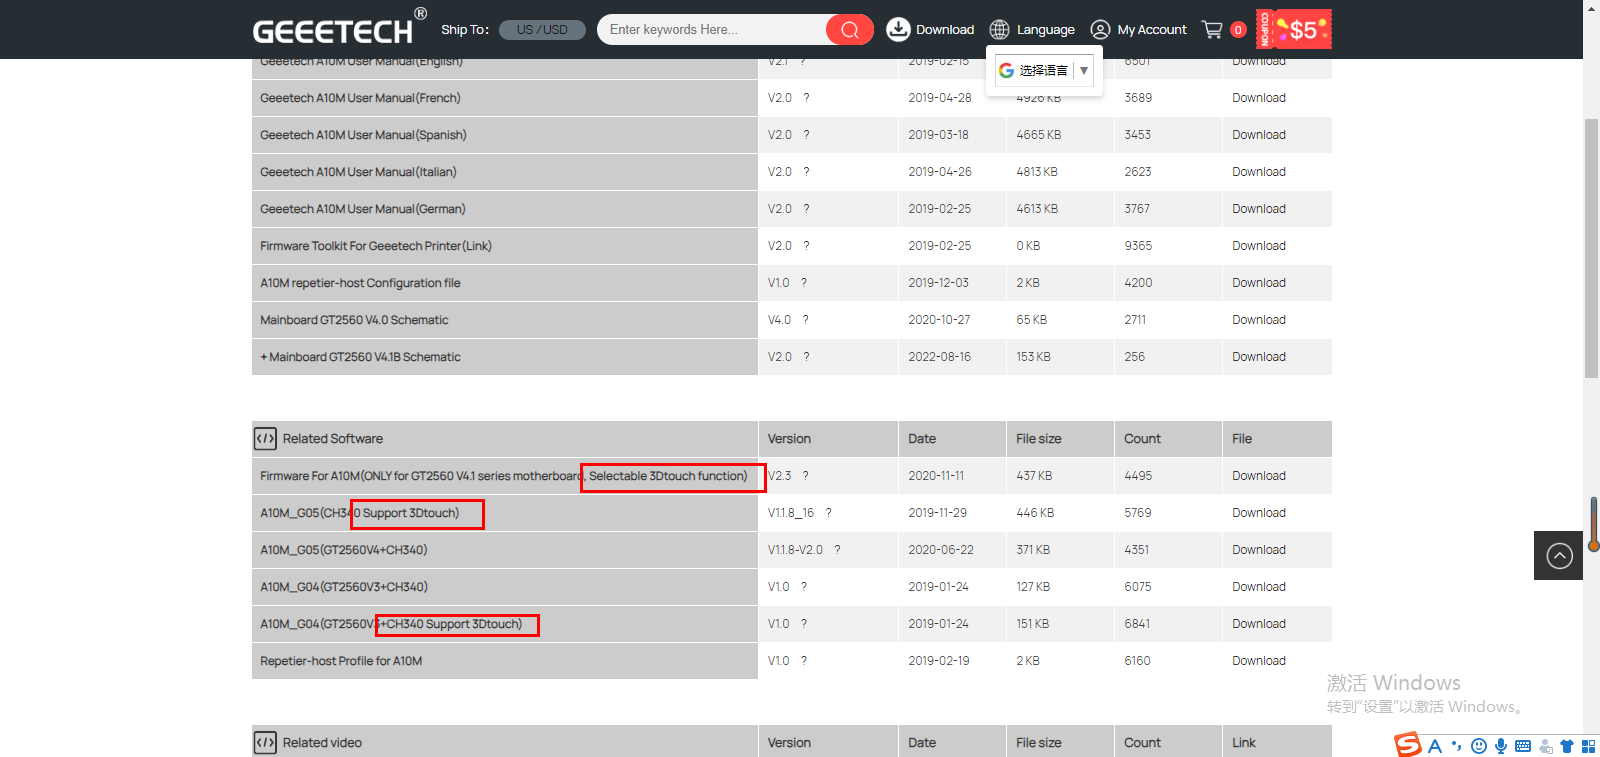
3.Please click the link below to download the firmware with 3D TOUCH and refresh it.https://www.geeetech.com/download.html
4.installation precautions:
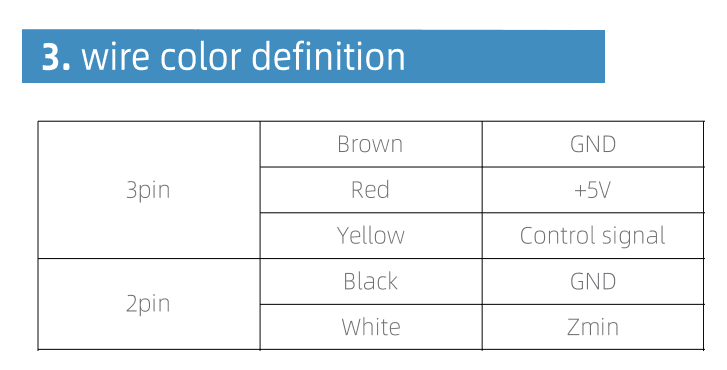
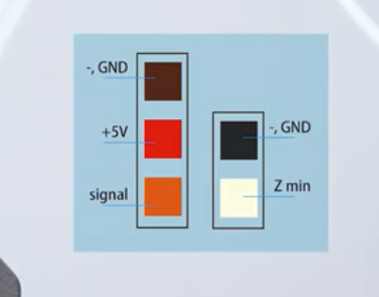
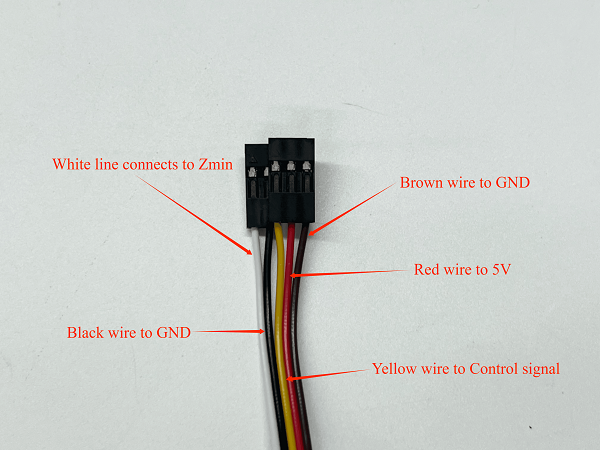
1. The 3DTouch line sequence diagram is as follows. After installation, confirm whether the LED light is on and whether the 3Dtouch can be extended/retracted normally.
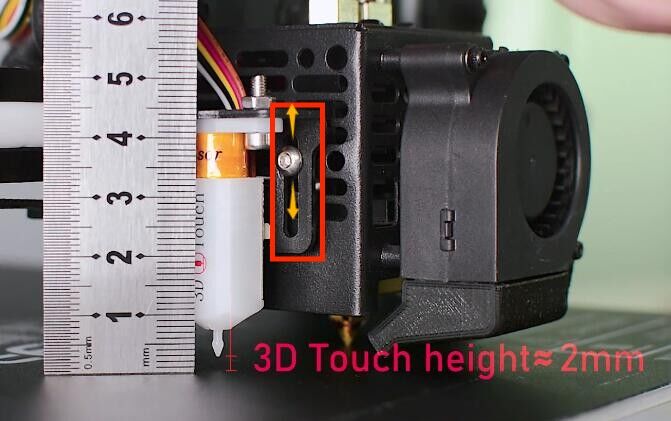
2. Installation height problem: The nozzle presses the hot bed or the leveling failure is caused by the incorrect installation height of the 3Dtouch. The 3Dtouch installation height or adjustment height standard is: the 3dtouch probe is 2mm higher than the nozzle position when retracted.
Please refer to the following video https://www.youtube.com/watch?v=YmXwFmB4qys
5.Troubleshooting
1. Fault phenomenon: the light is not on,
Failure Analysis:
(1). Check whether the direction of the power cord is plugged in correctly, and the line sequence of the machine should be consistent with 3DTOUCH
(2). Whether the power cord is disconnected
(3). Whether the terminal block is plugged correctly
2. Fault phenomenon: flashing red light
Failure Analysis:
(1). Check whether the fastening bolts are locked in place, and adjust the fastening bolts up and down appropriately
(2). When powering on, the probe should jump up and down, and finally retract, and the probe will be smoothly discharged
(3). Check whether the coil resistance is correct and cannot be broken
