Difference between revisions of "GLA10"
(→Leveling Preparation) |
(→Leveling test G-code) |
||
| (5 intermediate revisions by the same user not shown) | |||
| Line 1: | Line 1: | ||
=='''GLA10 Leveling Files Download Link'''== | =='''GLA10 Leveling Files Download Link'''== | ||
| + | |||
'''[https://www.youtube.com/watch?v=Xxm0mE1Qrgs GEEETECH GLA10 3D Printer Leveling Auxiliary Tool]'''<br> | '''[https://www.youtube.com/watch?v=Xxm0mE1Qrgs GEEETECH GLA10 3D Printer Leveling Auxiliary Tool]'''<br> | ||
'''[https://www.geeetech.com/specialpage/GCode_generator_for_GLA10.html GCode generator for GLA10]'''<br> | '''[https://www.geeetech.com/specialpage/GCode_generator_for_GLA10.html GCode generator for GLA10]'''<br> | ||
| Line 22: | Line 23: | ||
1. Insert the attached CR2032 battery in the battery holder on the GLA10. Please be careful not to install the wrong positive and negative poles when installing the battery.<br> | 1. Insert the attached CR2032 battery in the battery holder on the GLA10. Please be careful not to install the wrong positive and negative poles when installing the battery.<br> | ||
<br> | <br> | ||
| − | |||
2. GCode generator for GLA10<br> | 2. GCode generator for GLA10<br> | ||
Please click the link <big>'''''https://www.geeetech.com/specialpage/GCode_generator_for_GLA10.html'''''</big><br> | Please click the link <big>'''''https://www.geeetech.com/specialpage/GCode_generator_for_GLA10.html'''''</big><br> | ||
| Line 28: | Line 28: | ||
<br> | <br> | ||
3. Please copy or export the leveling Gcode to the Micro SD card.<br> | 3. Please copy or export the leveling Gcode to the Micro SD card.<br> | ||
| − | |||
4. Please clean up the residual filament on the nozzle so as not to affect the leveling accuracy. | 4. Please clean up the residual filament on the nozzle so as not to affect the leveling accuracy. | ||
=='''Start Leveling'''== | =='''Start Leveling'''== | ||
| − | 1. Power on the 3D printer, select the leveling auxiliary G-code pre-installed in the Micro SD, and start the hotbed leveling.The leveling auxiliary G-code will pause at the four corners of the hot bed for | + | 1. Power on the 3D printer, select the leveling auxiliary G-code pre-installed in the Micro SD, and start the hotbed leveling.The leveling auxiliary G-code will pause at the four corners of the hot bed for 30s respectively. After 30s, the nozzle will move to the next point. After the pause at the fourth corners, the printer will exit the leveling. |
2. After the leveling starts, the nozzle of the printer will automatically lift a certain distance. At this time, please place the end of the GLA10 with a cross pattern under the nozzle, and ensure that the nozzle is directly above the cross pattern of the GLA10. | 2. After the leveling starts, the nozzle of the printer will automatically lift a certain distance. At this time, please place the end of the GLA10 with a cross pattern under the nozzle, and ensure that the nozzle is directly above the cross pattern of the GLA10. | ||
| Line 39: | Line 38: | ||
3. At this time, please press and fix the other end of the GLA10 with one hand, and then quickly adjust the bot bed leveling nut corresponding to the current position of the nozzle with the other hand. When you see the green LED on the GLA10 just lights up, it means the current height of the hot bed is just right. Now, please take out the GLA10 and wait for the hot end moving to the next point. Pay attention that the GLA10 just lights up at all four corners of the hot bed. | 3. At this time, please press and fix the other end of the GLA10 with one hand, and then quickly adjust the bot bed leveling nut corresponding to the current position of the nozzle with the other hand. When you see the green LED on the GLA10 just lights up, it means the current height of the hot bed is just right. Now, please take out the GLA10 and wait for the hot end moving to the next point. Pay attention that the GLA10 just lights up at all four corners of the hot bed. | ||
| − | 4. After leveling, please use the Leveling test G-code to verify the leveling effect | + | 4. After leveling, please use the Leveling test G-code to verify the leveling effect.If any problem is found during the leveling test, please re-level the hotbed. |
| − | |||
| − | |||
== '''Leveling test G-code''' <br> == | == '''Leveling test G-code''' <br> == | ||
| Line 51: | Line 48: | ||
[[File:Cura-3.png|thumb|Custom Bed Level Pattern]] | [[File:Cura-3.png|thumb|Custom Bed Level Pattern]] | ||
[[File:Cura-4.png|thumb|Bed Level Pattern Type]] | [[File:Cura-4.png|thumb|Bed Level Pattern Type]] | ||
| − | 4.Please set the initial layer height and click "slice" to generate a leveling test | + | 4.Please set the initial layer height and click "slice" to generate a leveling test Gcode.<br> |
[[File:Cura-5.png|thumb|slice]] | [[File:Cura-5.png|thumb|slice]] | ||
<gallery> | <gallery> | ||
Latest revision as of 08:05, 5 February 2024
Contents
GLA10 Leveling Files Download Link
GEEETECH GLA10 3D Printer Leveling Auxiliary Tool
GCode generator for GLA10
GLA10 Leveling Files
Tips
① GLA10 is only suitable for 3D printers with leveling nuts on the hotbed.
② Please read this manual carefully for using GLA10 correctly.
③ Please scan the QR code or log in to our website to get the G-code file that GLA10 needs.
④ Please pay attention to safety when leveling the GLA10 hot bed, so as not to hurt your fingers by the moving hot end.
Leveling Preparation
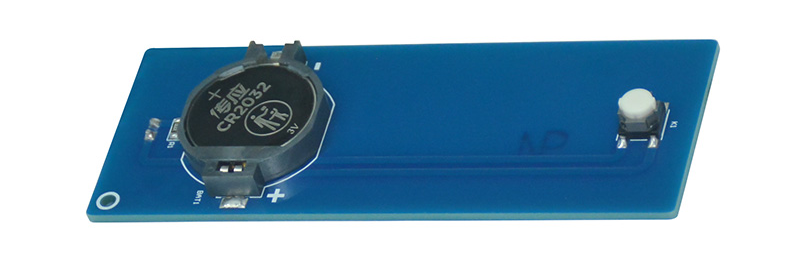
1. Insert the attached CR2032 battery in the battery holder on the GLA10. Please be careful not to install the wrong positive and negative poles when installing the battery.
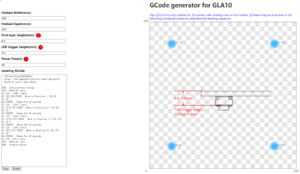
2. GCode generator for GLA10
  Please click the link  https://www.geeetech.com/specialpage/GCode_generator_for_GLA10.html

  We provide the corresponding G-codes for different hotbed sizes.Please edit the relevant information in the leveling Gcode generator.
3. Please copy or export the leveling Gcode to the Micro SD card.
4. Please clean up the residual filament on the nozzle so as not to affect the leveling accuracy.
Start Leveling
1. Power on the 3D printer, select the leveling auxiliary G-code pre-installed in the Micro SD, and start the hotbed leveling.The leveling auxiliary G-code will pause at the four corners of the hot bed for 30s respectively. After 30s, the nozzle will move to the next point. After the pause at the fourth corners, the printer will exit the leveling.
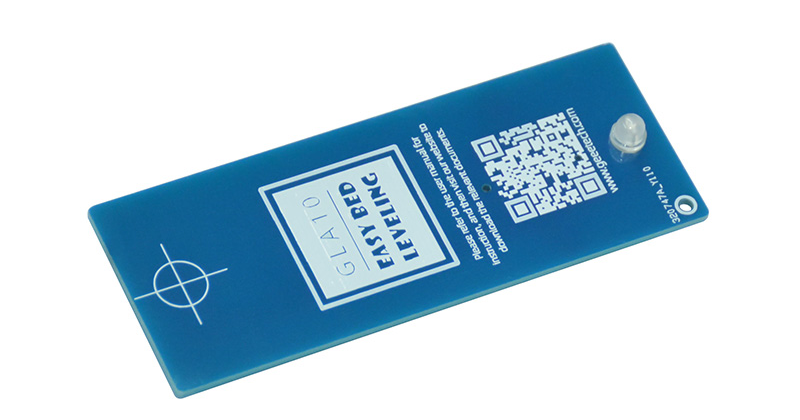
2. After the leveling starts, the nozzle of the printer will automatically lift a certain distance. At this time, please place the end of the GLA10 with a cross pattern under the nozzle, and ensure that the nozzle is directly above the cross pattern of the GLA10.
3. At this time, please press and fix the other end of the GLA10 with one hand, and then quickly adjust the bot bed leveling nut corresponding to the current position of the nozzle with the other hand. When you see the green LED on the GLA10 just lights up, it means the current height of the hot bed is just right. Now, please take out the GLA10 and wait for the hot end moving to the next point. Pay attention that the GLA10 just lights up at all four corners of the hot bed.
4. After leveling, please use the Leveling test G-code to verify the leveling effect.If any problem is found during the leveling test, please re-level the hotbed.
Leveling test G-code
1.Please install the Cura slicing software (https://ultimaker.com/software/ultimaker-cura/#downloads)
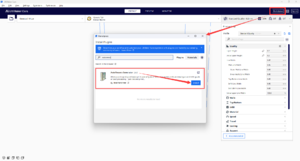
2.Please open the Cura slicing software and install the "Auto towers" plug-in in the Cura "Marketplace" plug-in market, and then restart Cura.
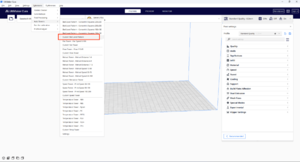
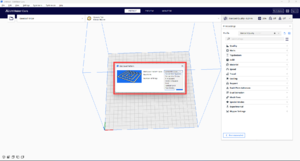
3.Please find the submenu "Auto Towers" in the Cura main menu "Extensions" ,then click "Custom Bed Level Pattern" and select "Bed Level Pattern Type"according to your preference.
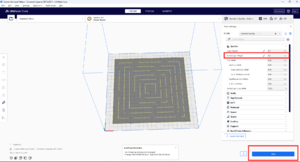
4.Please set the initial layer height and click "slice" to generate a leveling test Gcode.
Product Parameters
Battery parameter:CR2032,3V
Product size:90(L)*35(W)*12(H)mm
Packing size:18(L)*75(W)*40(H)mm
Product weight:14.5g
Packing weight:52g
