Difference between revisions of "Delta Rostock mini G2"
(→building instruction) |
(→install drivers and software) |
||
| Line 84: | Line 84: | ||
=install drivers and software= | =install drivers and software= | ||
| + | Install the drivers | ||
| + | |||
| + | Installing Drivers Before printing, you’ll need to install drivers. The kind of driver that a Rostock mini G2 and G2s requires in order to operate properly is called a USB Serial Driver. A USB Serial Driver is software that establishes a COM port. | ||
| + | |||
| + | Plug the USB into a USB port on your computer. Windows Update should automatically find and install the drivers. You’re done with installing the drivers! | ||
| + | |||
| + | |||
| + | |||
| + | Windows Manual Install | ||
| + | Note: In some cases the drivers will not install on their own. The drivers for Windows can be found | ||
| + | |||
| + | [http://www.ftdichip.com/Drivers/CDM/CDM%20v2.12.00%20WHQL%20Certified.exe here]. | ||
Revision as of 02:57, 25 May 2015
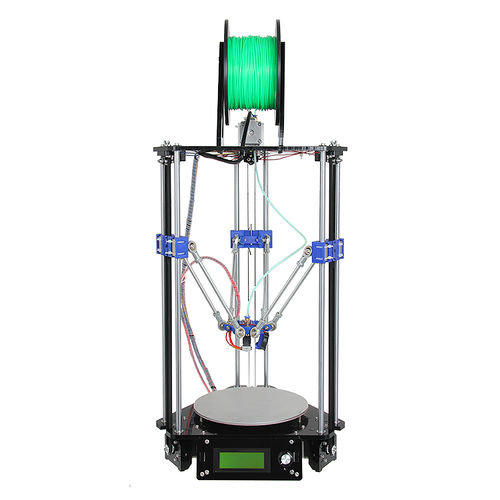
This Rostock mini G2 is a new upgraded delta 3D printer based on the modified design of the Geeetech Delta Rostock mini generation 1.
On the whole, the Rostock mini G2 succeeds the advantages of the previous version like small physical footprint, simple but really rigid frame, high positioning accuracy, flexible effectors, and very similar specification except that we add some innovative design.
This G2 is powered by our newly designed control system—GT2560 that supports 2 extruders and eliminates the complicated wiring of Mega2560+Ramps 1.4 and it is more space-saving and convenient.
We also add an auto-leveling auto-calibration device for G2;which means you do not have to adjust it every time before you start printing, after the first assembly work, you can almost plug and play.
In terms of printing filament, apart from PLA and ABS, G2 supports Nylon and wood filament, which enables more possibilities to create 3D printing project.
This G2 is also improved with a build-on LCD control panel; you can monitor the printing process in real time and with a SD card it can realize stand-alone printing, very convenient.
Main features:
1. New updated control system.
2. Auto-leveling and auto-calibration.
3. More flexible effectors and diagonal rods.
4. More fluent printing process and higher precession.
5. Support PLA, ABS, Nylon and Wood filament.
6. Further simplified structure and enhanced stability.
Specifications:
Print size (X Y Z): 150 x 150 x 210mm
Chassis: laser -cut acrylic plate
The Layer Thickness: 0.1mm
Layer Resolution: 0.1mm
Filament Diameter: 1.75, 0.3mm
Nozzle Diameter: 0.3, 0.35, 0.4, 0.5mm
Print Speed: 60 to 120 mm/sec
Print Plate Size: 210 x 3mm
Print Plate (Build Platform): aluminum plate + MK2A heatbed
XYZ Bearings: carbon steel
Stepper Motors: 1.8° step angle with 1/16 micro-stepping
Max Heated Bed Temp: about 110 ℃
Max Extruder Temp: about 240 ℃
AC Input: 115V/1.5A 230V/0.75A
Output:DC12V/0-15A
No. of Extruders: 1
Connectivity (Interface): USB, SD Card
Electronics: GT2560
3D printing Software: Repetier Host
CAD Input data file format supported: STL, G code
Client Operating System: Windows, Linux, Mac
Machine Dimensions: 320 x 320 x 870mm
Machine weight: 7.5kg
Shipping box dimensions:
Shipping box weight:
building instruction
For detailed building instruction, please visit here.
install drivers and software
Install the drivers
Installing Drivers Before printing, you’ll need to install drivers. The kind of driver that a Rostock mini G2 and G2s requires in order to operate properly is called a USB Serial Driver. A USB Serial Driver is software that establishes a COM port.
Plug the USB into a USB port on your computer. Windows Update should automatically find and install the drivers. You’re done with installing the drivers!
Windows Manual Install Note: In some cases the drivers will not install on their own. The drivers for Windows can be found
here.
