Difference between revisions of "Acrylic Prusa I3 pro B"
(→specifications) |
(→Safety Instructions) |
||
| Line 173: | Line 173: | ||
please refer [http://www.geeetech.com/specialpage/i3/i3.html here] for more detaied introduction. | please refer [http://www.geeetech.com/specialpage/i3/i3.html here] for more detaied introduction. | ||
| + | |||
| + | |||
| + | =Assembly= | ||
| + | |||
| + | [http://www.geeetech.com/wiki/index.php/Acrylic_Prusa_I3_build_instruction(8mm) assembly manual for the new 8mm one] | ||
| + | |||
| + | =Install the drivers and software= | ||
| + | |||
| + | ==Install the drivers== | ||
| + | |||
| + | Installing Drivers | ||
| + | |||
| + | Before printing, you’ll need to install drivers. The kind of driver that a Prusa I3 requires in order to operate properly is called a USB Serial Driver. A USB Serial Driver is software that establishes a COM port. | ||
| + | |||
| + | Plug the USB into a USB port on your computer. Windows Update should automatically find and install the drivers. You’re done with installing the drivers! | ||
| + | |||
| + | '''Windows 8''' | ||
| + | |||
| + | When you attempt to install the unsigned 3rd party driver on Windows 8, you will most likely not be able to install because the file is not digitally signed. To get around this restriction, you must temporarily remove this restriction by following the instructions [http://www.howtogeek.com/167723/how-to-disable-driver-signature-verification-on-64-bit-windows-8.1-so-that-you-can-install-unsigned-drivers/ here ]. | ||
| + | |||
| + | Once you have followed the directions to disable driver signature enforcement, download the driver and click to install. This is only a temporary change, however, and restarting your computer after you have installed the driver will return your computer to its normal state. | ||
| + | |||
| + | Note that this involves restarting your computer, so make sure to close out all other windows. You may want to print out these instructions so you can refer to them while your computer is restarting. | ||
| + | |||
| + | |||
| + | '''Windows Manual Install''' | ||
| + | |||
| + | Note: In some cases the drivers will not install on their own. The drivers for Windows can be found in the following link: | ||
| + | |||
| + | [http://www.geeetech.com/wiki/images/d/d3/Serial_install.rar Drivers] | ||
| + | |||
| + | If the driver was not automatically installed, you may see this screen: | ||
| + | |||
| + | [[File:INSTALL 1.png]] | ||
| + | |||
| + | In this case, | ||
| + | a. Click “Change Settings…” | ||
| + | |||
| + | b. Select “Install driver software from Windows Update”. | ||
| + | |||
| + | c. Click “Save Changes”. The FTDI drivers should now install successfully. | ||
| + | |||
| + | [[File:INSTALL 2.png]] | ||
| + | |||
| + | |||
| + | Attention: For those having difficulty selecting your COM port | ||
| + | |||
| + | If you have installed the USB serial driver successfully and you are still not able to connenct to your printer in Repetier Host, then windows has not recognized the newly installed driver. | ||
| + | In Repetier Host, you may even notice an error message that is similar to this one: | ||
| + | |||
| + | Serial com error:System.IO.Ports.SerialErrorReceivedEventArgs | ||
| + | |||
| + | In some situations, a computer running windows will not automatically recognize a newly installed Serial driver. This means that you will have to update your newly installed driver manually. | ||
| + | |||
| + | To manually update the driver, you will first need to plug the USB cable into your printer and attache the other end directly to one of your computer’s USB ports. Now, enter the ‘Device Manager’ in Windows and navigate to the hardware category called Ports (COM & LPT) and then left click on it once. You should notice the Ports category expand to reveal a Sub-Category called USB Serial (Communication Class, Abstract Control Model) (COM X); where X is the COM port number. You should be looking for that COM port number in Repetier Host after this procedure is completed; which can be found in “Printer Settings.” | ||
| + | |||
| + | [[File:INSTALL3.jpg|700px|]] | ||
| + | |||
| + | You will need to right click on the USB Serial Sub-class and select proprties. In the drivers tab you will find a selection to update drivers, click on Update Drivers to access the next menu. | ||
| + | |||
| + | Now that you have selected which driver to update, you will have to tell Windows where the “updated” driver can be found. You should be presented with two options. Select “Browse my computer for driver software” to locate and install the driver software manually. | ||
| + | |||
| + | [[File:Install 4.jpg]] | ||
| + | |||
| + | Next, you will be greeted by a menu that allows you to “Browse for driver software on your computer” You will be presented with two choices, select “Let me pick from a list of device drivers on my computer.” Now select the Serial port device and proceed with the installation. | ||
| + | |||
| + | [[File:Install 5.jpg]] | ||
| + | |||
| + | That is pretty much all there is to it. You will then see an installation indicator bar. | ||
| + | |||
| + | [[File:Install 6.jpg]] | ||
| + | |||
| + | Once the installation is complete you will be notified that “Windows has successfully updated your driver software.” You will be prompted to restart your computer; you should do so. | ||
| + | |||
| + | [[File:Install 7.jpg]] | ||
| + | |||
| + | |||
| + | '''Macbook'''<br> | ||
| + | |||
| + | Download link of driver: http://www.ftdichip.com/Drivers/VCP.htm <br> | ||
| + | |||
| + | Download the driver that is compatible with system version. | ||
| + | |||
| + | Open the downloaded file, you will see a .pkg file, Open "FTDIUSBSerial.pkg"<br> | ||
| + | |||
| + | [[File:FTDI for mac 1.jpg]] | ||
| + | |||
| + | Click "Continue" in Instruction.<br> | ||
| + | [[File:FTDI for mac 2.jpg]] | ||
| + | |||
| + | Click "Continue" in Read me.<br> | ||
| + | [[File:FTDI for mac 3.jpg]] | ||
| + | |||
| + | Click "Continue" in License.<br> | ||
| + | [[File:FTDI for mac 4.jpg]] | ||
| + | |||
| + | Click "Agree" to continue installation.<br> | ||
| + | [[File:FTDI for mac 5.jpg]] | ||
| + | |||
| + | Select the installing destination and click "Continue".<br> | ||
| + | [[File:FTDI for mac 6.jpg]] | ||
| + | |||
| + | Click "Install" in Installatin Type.<br> | ||
| + | [[File:FTDI for mac 7.jpg]] | ||
| + | |||
| + | Mac will start to install the driver:<br> | ||
| + | [[File:FTDI for mac 8.jpg]]<br> | ||
| + | [[File:FTDI for mac 9.jpg]] | ||
| + | |||
| + | Once your computer restarts, try selecting the appropriate COM port and baud rate in Repetier Host and then connect. | ||
| + | |||
| + | ==Install Software== | ||
| + | |||
| + | we will take windows OS as an example. | ||
| + | |||
| + | To install all required software by Prusa I3, please follow the steps provided below. | ||
| + | |||
| + | 1) Download and install: [http://www.geeetech.com/wiki/images/9/96/SetupRepetierHostGEEEtech_0_90D_2.zip RepetierGEtechSetup.exe] | ||
| + | |||
| + | step 1,start the installer,choose the display language. | ||
| + | step 2,click next to continue | ||
| + | |||
| + | [[File:Step2.png]] | ||
| + | |||
| + | step3,select the destination where you would like to install the RepetierGEtechSetup. | ||
| + | |||
| + | [[File:Step3.png]] | ||
| + | |||
| + | step4,select start menu folder and create a shortcut, click next to continue. | ||
| + | |||
| + | [[File:Step4.png]] | ||
| + | |||
| + | step 5,get ready to install. Click install. | ||
| + | |||
| + | [[File:Step 5.png]] | ||
| + | |||
| + | step 6,wait about half a minute while installing. The green bar will show you the rate. | ||
| + | |||
| + | [[File:Step6.png]] | ||
| + | |||
| + | step 7,set up has finished the installing, you can choose to launch it immediately or exit out. | ||
| + | |||
| + | [[File:Step7.png]] | ||
| + | |||
| + | |||
| + | |||
| + | |||
| + | 2) Plug the power cord into a wall outlet and the USB cable into a USB port on your computer. Windows should detect your motherboard and assign the appropriate driver. | ||
| + | |||
| + | 3) Open Repetier Host and Connect to your Prusa I3! | ||
| + | |||
| + | Click on the Manual Controls Tab and click in a direction X or Y to test your connection. | ||
| + | If you are having difficulty connecting, please review the following supportive documentation: Installing Drivers and How to connect. | ||
| + | |||
| + | Please note that if you have difficulty connecting, there might have been an issue with the installation process. Ensure that the following have been installed: | ||
| + | |||
| + | Download and install the Serial Driver. | ||
| + | |||
| + | Download and install [http://www.microsoft.com/en-us/download/details.aspx?id=21 Microsoft .netFrameWork 3.5] | ||
| + | |||
| + | <font color="red">'''In Mac, you can download Repetier for Mac" at:'''</font> | ||
| + | ::http://www.repetier.com/w/?wpdmdl=1777 | ||
| + | |||
| + | After downloading, open "Repetier-Host-Mac_56.dmg",then you will see the icon of "Repetier Host", open it.<br> | ||
| + | [[File:QQ截图20150429160309.png]] | ||
Revision as of 08:38, 4 May 2015
Contents
Introduction
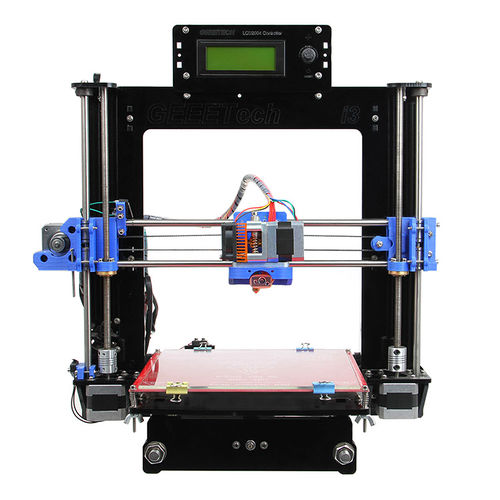
This Geeetech I3 pro B 3D printer is designed and manufactured by Shenzhen Getech Co., Ltd based on Geeetech I3 pro, except its simple assembly, easy debugging and more stable performance, compared with the I3 pro, I3 pro B features newly added potential for 3D prints—support 5 types of filament: ABS, PLA, Wood, Nylon, flexible PLA and filament, create flexible hinges, joints, shaped parts; enable you to get the most out of your 3D Printer.
Features
1.Re-designed barrel of extruder to support multiple filaments: ABS/PLA/Flexible PLA/WOOD, making 3D printing more flexible.
2. Further simplified structure means fast assembly and easy adjustment, which saves you both time and energy as well as speeds up the molding of your innovative products and ideas. It usually takes up to 3 days for a DIYer to assemble the previous I3, not to mention the post-adjustment and debugging work. As to this I3 of Acrylic Frame, however, you can save 70% of time.
3. Enhanced stability and reliability. Geeetech I3 pro B adopts 8 mm-thick acyclic plates, also you can choose the piano-black one and the transparent one, and both colors look good.
4. The PSU (power supply unit) is assembled together with the printer; which saves you a lot of space and can avoid unnecessary electrical trouble.
5. All the cables and wires are well arranged to make it more neat and easy to operate.
6. MK8 extruder ensures smaller layers and higher resolution, make models and objects.General Tips & Tricks for printing with Flexible and wood
specifications
Printing specifications
Print technology: Fused Filament Fabrication
Build volume: 200 x200x180mm
Layer resolution: 0.1-0.3mm
Positioning Precision: 0.1-0.3mm
Filament diameter: 1.75mm, 3mm
Nozzle diameter: 0.3mm, 0.35mm, 0.4 mm, 0.5mm
Filament type: ABS/ PLA/Flexible PLA/ Wood /Nylon
Software:
Operating system: Windows/Mac/Linux
Control software: Repetier-Host, Printrun
File format: .STL. G-code
Temperature:
Max heated bed temperature: about 110°C
Max extruder temperature: about 240°C
Electrical:
Power supply: Input:
115V/1.5A 230V/0.75A
Output:DC12V/0-15A
Connectivity: USB, SD card (support off-line printing)
Mechanical:
Body: Acrylic plate of 8 mm thickness (black/ transparent)
Build Platform: Borosilicate glass + MK2A heatbed
XYZ Rods: Wear-resistant, stainless steel
Stepper Motors: 1.8° step angle with 1/16 micro-stepping
Physical structure: Reprap
Physical dimensions:
Without spool: 45 x 44 x 44 cm
With spool: 45 x 44 x 68 cm
Shipping box: 52 x 42 x 23 cm
Net weight: 8. 5 kg
Safety Instructions
We recommend the following practice instructions for the safe and effective use of our printers. Failure to follow these practice instructions may (i) degrade your printer’s performance;
(ii) cause injury and/or damage;
(iii) disqualify you from customer support. Please ensure that you have read and understand all practice instructions before using your Prusa I3 printer for the first time.
You can contact the Prusa I3 Customer Support Team with any questions about the practice instructions at our [forum].
Operation
- Never reach inside your Prusa I3 printer when it is turned on. Moving parts can cut or pinch you, and several parts reach high temperatures that can cause burns and other injuries.
- Always allow your Prusa I3 printer to cool down for at least 5 minutes before you touch any internal part or remove a printed object.
- Never leave your Prusa I3 printer unattended while printing or powered on.
- Always turn off your Prusa I3 printer and disconnect it from your computer when not in use.
- Never attempt to print using any materials that have not been approved by Prusa I3.
- Keep the nozzle tip at least two inches away from the heated build platform anytime you are not running a print job.
- Never operate your Prusa I3 printer if it appears damaged.
- In case of an emergency or malfunction, immediately disconnect your Prusa I3 printer from the power outlet and computer.
Placement
- Always operate your Prusa I3 printer in an open, well-ventilated area to allow potentially irritating fumes to dissipate.
- Never operate your Prusa I3 printer outdoors, near open windows, or anywhere where it may be exposed to water or moisture.
- Always place your Prusa I3 printer on a flat and sturdy surface to avoid power interruptions and deformities in your prints.
- Never place objects on or above your Prusa I3 printer or power supply.
- Always have a working fire and smoke alarm in the same room as your Prusa I3 printer.
- Never place your Prusa I3 printer near open flames, heat sources, or flammable materials.
Connectivity
To avoid printing interruptions, disable your screensaver, sleep, and hibernate functions on your computer.
- Make sure the heating plate and extruder are not heated when starting software.
Power
- Plug your computer and Prusa I3 printer into the same power outlet for best performance.
- We recommend plugging your Prusa I3 printer into a surge protector with a circuit breaker.
Never attempt to open or fix your power supply. If you believe your power supply is not working properly, contact us asap.
- Only use the power supply that was provided with your Prusa I3 printer.
- Do not plug your Prusa I3 printer into the same outlet as power hungry devices such as air conditioners, space heaters, or other large appliances.
Modifications
Prusa I3 printers are tested for performance and safety before they leave the factory. Prusa I3 cannot guarantee the performance or safety of printers that have been modified by users.
- THERE IS A RISK OF ELECTRICAL SHOCK. UNIT IS NOT USER SERVICEABLE.
- Prusa I3 PRINTERS CONTAIN HEATED MOVING PARTS. NEVER REACH INSIDE THE PRINTER WHILE IT IS IN OPERATION OR BEFORE IT HAS COOLED DOWN.
- NEVER LEAVE YOUR Prusa I3 PRINTER UNATTENDED WHILE POWERED ON OR PRINTING.
- DISCONNECT YOUR Prusa I3 PRINTER FROM THE POWER SUPPLY AND COMPUTER WHEN NOT IN USE.
- DO NOT ATTEMPT TO PRINT MATERIALS NOT APPROVED BY Prusa I3.
- ONLY OPERATE YOUR Prusa I3 PRINTER IN A WELL-VENTILATED SPACE AWAY FROM MOISTURE AND HEAT SOURCES WITH A WORKING SMOKE/FIRE ALARM.
Filament: 1. The melting temperature is different for different type of filament; please refer to the suggested temperature you are using. The guideline for an optimal printing temperature is at approximately 210°C for flexible and 230°C for wood filament. The recommended heated bed temperature varies between ± 60˚C and ± 100˚C.
2. It is recommended to significantly lower your printing speed (compared to printing with PLA, or ABS) when printing with Flexible filament and wood filament.Specifications
please refer here for more detaied introduction.
Assembly
assembly manual for the new 8mm one
Install the drivers and software
Install the drivers
Installing Drivers
Before printing, you’ll need to install drivers. The kind of driver that a Prusa I3 requires in order to operate properly is called a USB Serial Driver. A USB Serial Driver is software that establishes a COM port.
Plug the USB into a USB port on your computer. Windows Update should automatically find and install the drivers. You’re done with installing the drivers!
Windows 8
When you attempt to install the unsigned 3rd party driver on Windows 8, you will most likely not be able to install because the file is not digitally signed. To get around this restriction, you must temporarily remove this restriction by following the instructions here .
Once you have followed the directions to disable driver signature enforcement, download the driver and click to install. This is only a temporary change, however, and restarting your computer after you have installed the driver will return your computer to its normal state.
Note that this involves restarting your computer, so make sure to close out all other windows. You may want to print out these instructions so you can refer to them while your computer is restarting.
Windows Manual Install
Note: In some cases the drivers will not install on their own. The drivers for Windows can be found in the following link:
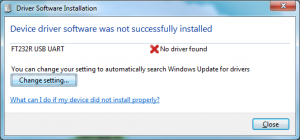
If the driver was not automatically installed, you may see this screen:
In this case, a. Click “Change Settings…”
b. Select “Install driver software from Windows Update”.
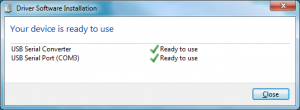
c. Click “Save Changes”. The FTDI drivers should now install successfully.
Attention: For those having difficulty selecting your COM port
If you have installed the USB serial driver successfully and you are still not able to connenct to your printer in Repetier Host, then windows has not recognized the newly installed driver. In Repetier Host, you may even notice an error message that is similar to this one:
Serial com error:System.IO.Ports.SerialErrorReceivedEventArgs
In some situations, a computer running windows will not automatically recognize a newly installed Serial driver. This means that you will have to update your newly installed driver manually.
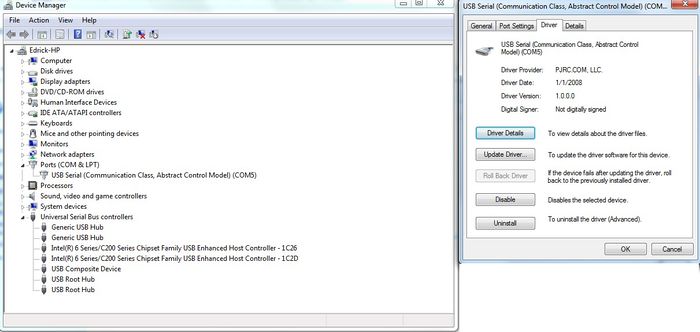
To manually update the driver, you will first need to plug the USB cable into your printer and attache the other end directly to one of your computer’s USB ports. Now, enter the ‘Device Manager’ in Windows and navigate to the hardware category called Ports (COM & LPT) and then left click on it once. You should notice the Ports category expand to reveal a Sub-Category called USB Serial (Communication Class, Abstract Control Model) (COM X); where X is the COM port number. You should be looking for that COM port number in Repetier Host after this procedure is completed; which can be found in “Printer Settings.”
You will need to right click on the USB Serial Sub-class and select proprties. In the drivers tab you will find a selection to update drivers, click on Update Drivers to access the next menu.
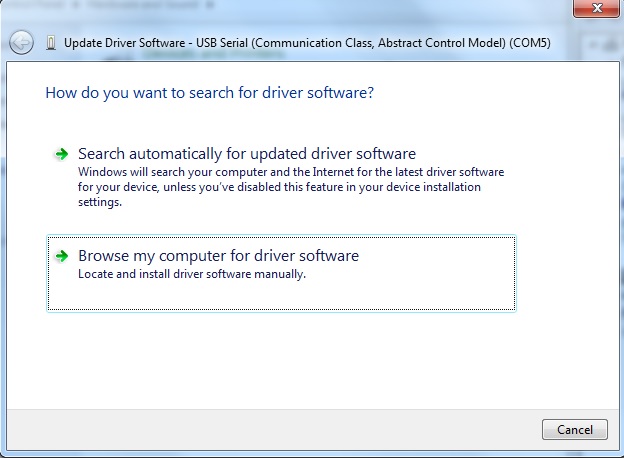
Now that you have selected which driver to update, you will have to tell Windows where the “updated” driver can be found. You should be presented with two options. Select “Browse my computer for driver software” to locate and install the driver software manually.
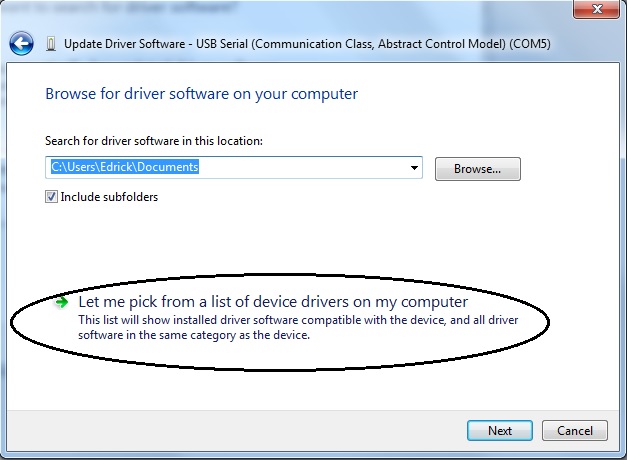
Next, you will be greeted by a menu that allows you to “Browse for driver software on your computer” You will be presented with two choices, select “Let me pick from a list of device drivers on my computer.” Now select the Serial port device and proceed with the installation.
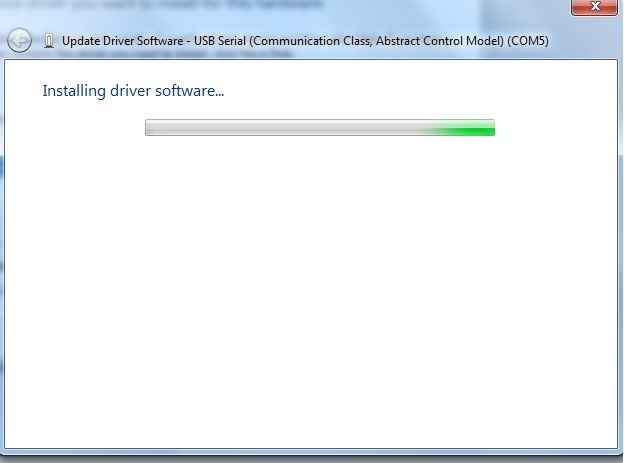
That is pretty much all there is to it. You will then see an installation indicator bar.
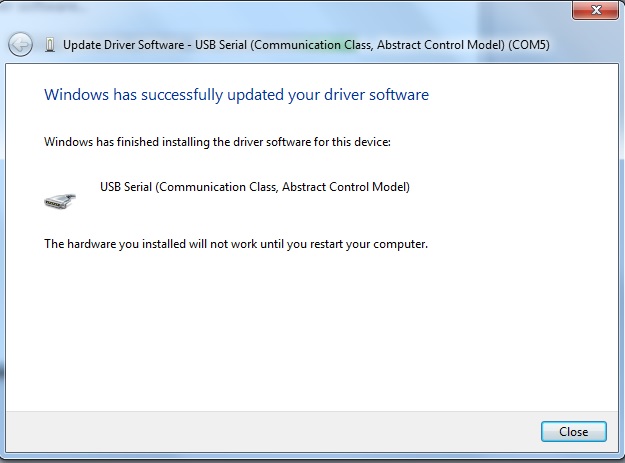
Once the installation is complete you will be notified that “Windows has successfully updated your driver software.” You will be prompted to restart your computer; you should do so.
Macbook
Download link of driver: http://www.ftdichip.com/Drivers/VCP.htm
Download the driver that is compatible with system version.
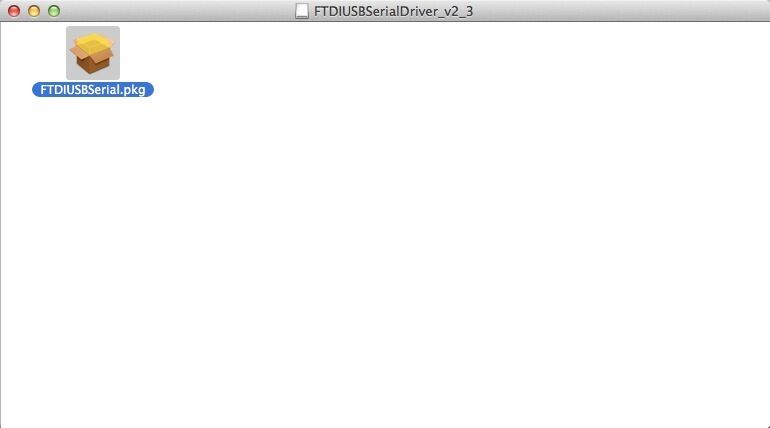
Open the downloaded file, you will see a .pkg file, Open "FTDIUSBSerial.pkg"
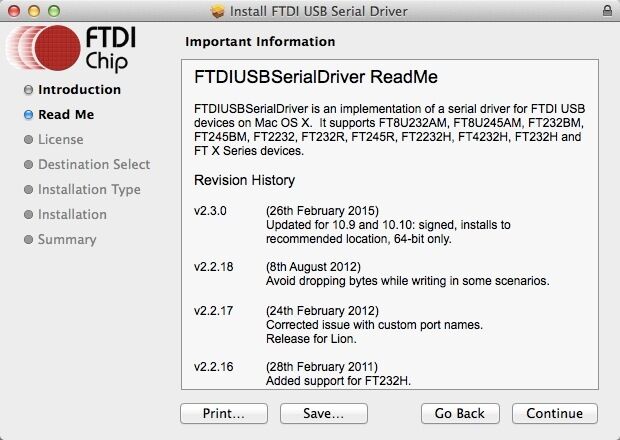
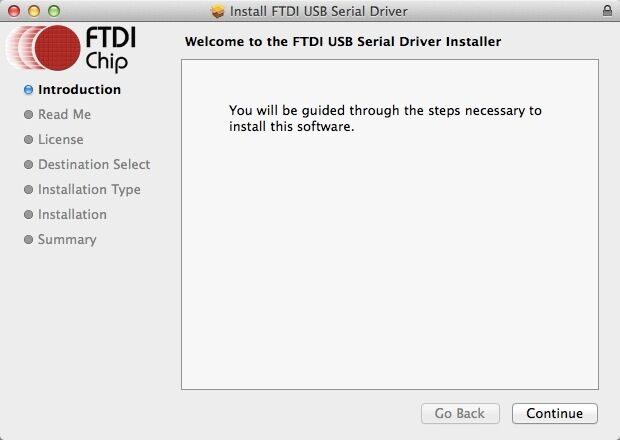
Click "Continue" in Instruction.
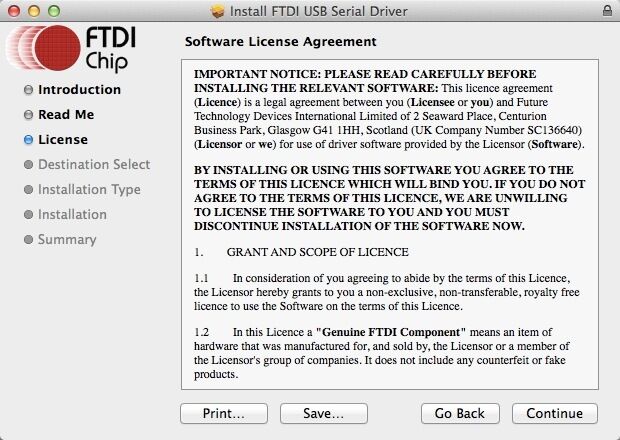
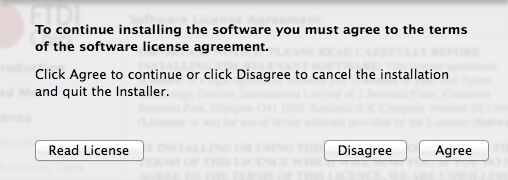
Click "Agree" to continue installation.
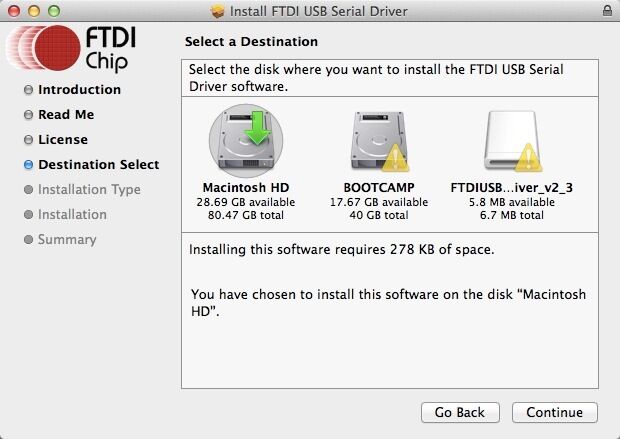
Select the installing destination and click "Continue".
Click "Install" in Installatin Type.
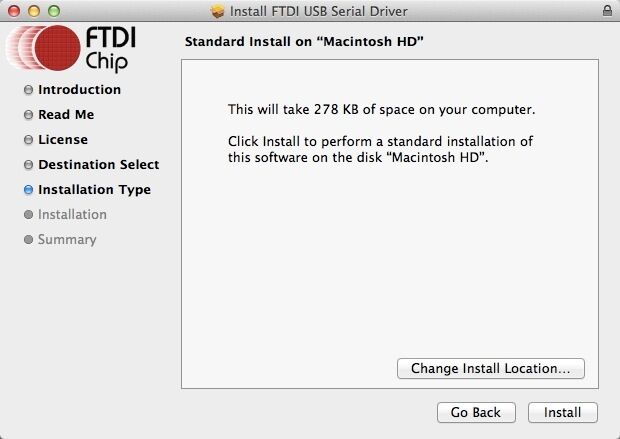
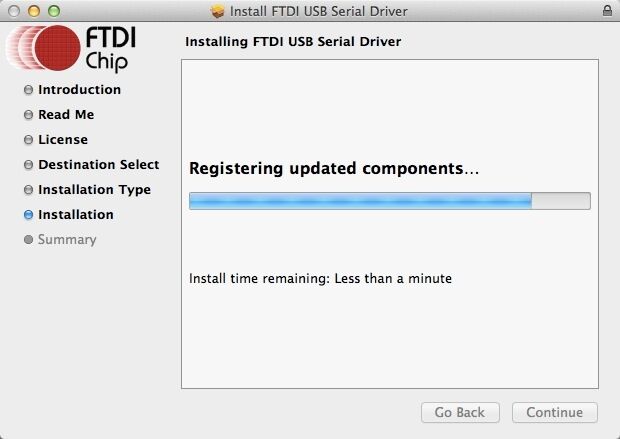
Mac will start to install the driver:
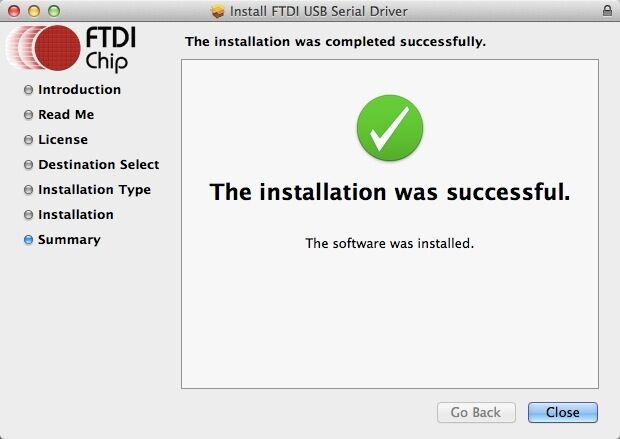
Once your computer restarts, try selecting the appropriate COM port and baud rate in Repetier Host and then connect.
Install Software
we will take windows OS as an example.
To install all required software by Prusa I3, please follow the steps provided below.
1) Download and install: RepetierGEtechSetup.exe
step 1,start the installer,choose the display language. step 2,click next to continue
step3,select the destination where you would like to install the RepetierGEtechSetup.
step4,select start menu folder and create a shortcut, click next to continue.
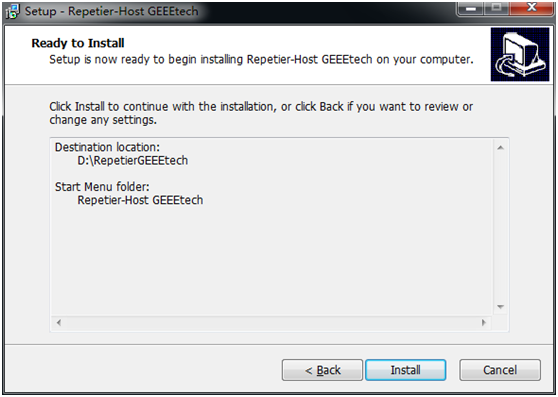
step 5,get ready to install. Click install.
step 6,wait about half a minute while installing. The green bar will show you the rate.
step 7,set up has finished the installing, you can choose to launch it immediately or exit out.
2) Plug the power cord into a wall outlet and the USB cable into a USB port on your computer. Windows should detect your motherboard and assign the appropriate driver.
3) Open Repetier Host and Connect to your Prusa I3!
Click on the Manual Controls Tab and click in a direction X or Y to test your connection. If you are having difficulty connecting, please review the following supportive documentation: Installing Drivers and How to connect.
Please note that if you have difficulty connecting, there might have been an issue with the installation process. Ensure that the following have been installed:
Download and install the Serial Driver.
Download and install Microsoft .netFrameWork 3.5
In Mac, you can download Repetier for Mac" at:
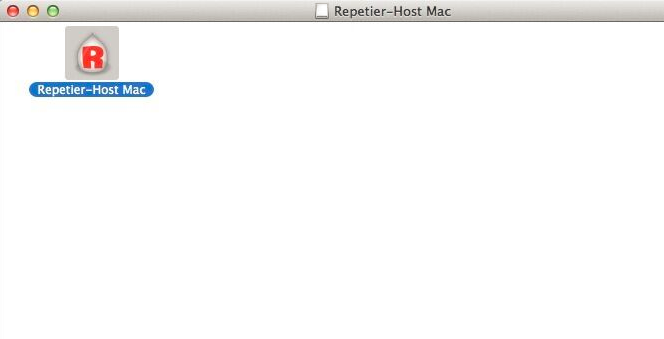
After downloading, open "Repetier-Host-Mac_56.dmg",then you will see the icon of "Repetier Host", open it.
