Difference between revisions of "Arduino MEGA Ultimaker Shield"
(→Overview) |
(→USE) |
||
| (One intermediate revision by the same user not shown) | |||
| Line 2: | Line 2: | ||
[[Image:Arduino MEGA Ultimaker Shield1.jpg|500px|]] | [[Image:Arduino MEGA Ultimaker Shield1.jpg|500px|]] | ||
| − | |||
This is a board that's very similar to other Pololu-based electronics implementations, including [http://www.geeetech.com/ramps-reprap-mega-pololu-a4988-extend-shield-p-606.html RAMPS],but it can support up to 5 steppers (three for X, Y, Z, | This is a board that's very similar to other Pololu-based electronics implementations, including [http://www.geeetech.com/ramps-reprap-mega-pololu-a4988-extend-shield-p-606.html RAMPS],but it can support up to 5 steppers (three for X, Y, Z, | ||
| Line 109: | Line 108: | ||
| − | [[Image:UltimakerRev3.jpg]] | + | [[Image:UltimakerRev3.jpg|400px|]] |
Latest revision as of 09:55, 6 November 2014
Contents
Overview
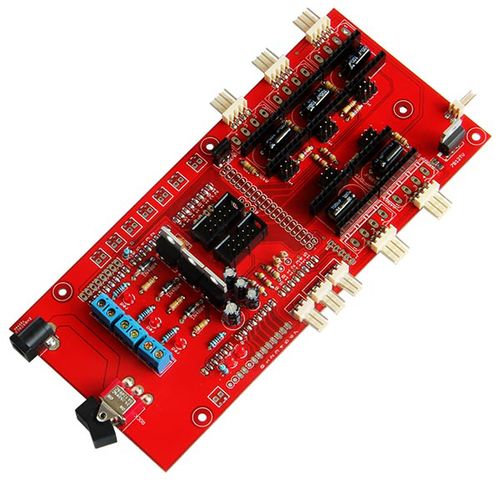
This is a board that's very similar to other Pololu-based electronics implementations, including RAMPS,but it can support up to 5 steppers (three for X, Y, Z,
one for an extruder and one for any other function). You can add as many stepper driver carriers as youneed. It is designed to run at higher voltages than
12 Volts, This allows you to put 90 Watts out of one MOSFET and run your stepper motors with more torque and higher maximum speeds. This board is also
used on the Mantis-30 milling machine from Protospace and on various Mendel's that people have built.
Note: When the jumper (closer the VR-tube 7812TV)is connected ,the power of Arduino MEGA Ultimaker Shield also will power up the Mega.
Features:
- Arduino Mega Shield
- Plug in all motors with simple 4-way JST connectors.
- Made for Ultimaker's UltiStepper Driver.
- Compatible with Pololu stepper driver boards.
- Controls up to 5 stepper motors (3 for the X, Y and Z axis one for an extruder (the "E axis"), optionally you can add another axis by adding a Pololu
stepper driver.
- Configurable step sizes by placing jumpers
- 3x 55 Amp MOSFETs outputs (with LED indicators. Actual current capability limited by PCB and connectors)
- All pins are broken out for maximum extensibility
- Runs from 15V to 19V.
- Three thermocouple inputs, or thermistor inputs. The 100K thermistor is recommended.
- Has a IDC header for adding an LCD panel (movie here)
- Has a header for adding an SD card module.
- A toggle-switch for powering up/down the board
- Easier to wire up thermocouples
- Includes a 12V regulator for an (always on) fan to cool the electronics.
- A PWM output with power for LED arrays and other lighting
- LCD backlight dimming can now be software controlled
- A serial I/O header for bluetooth and ethernet add-ons.
- Servo outputs for experimental setups. They need to be interrupt or software driven as the pins routed to the servo header I/O do not have PWM.
Pinout of Extension connectors:
Arduino pins as seen from above, the gray box with the text is also the orientation part of the connector
Test:
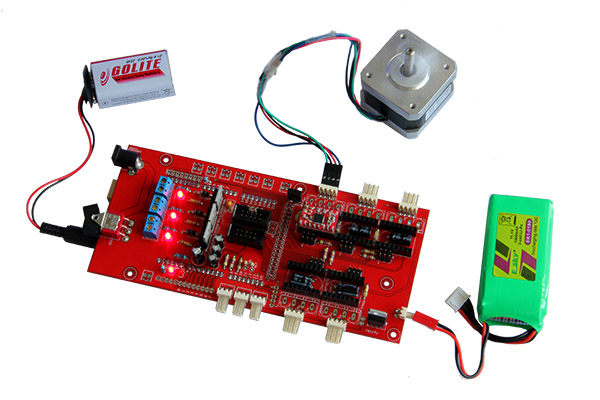
This is a simple test for your Arduino MEGA Ultimaker Shield ,motor ,Stepper driver and power.
Hardware needed
- Arduino MEGA Ultimaker Shield x1
- Mega 2560 x1
- Stepper Driver A4983 x1
- Stepping motor x1
- DC power of 15V to 19V
steps
1.Upload Test for Arduino MEGA Ultimaker Shield to your Mega.
2.Connect the Mege ,Arduino MEGA Ultimaker Shield,A4983,Stepping motor and power.
3.Test should be all ports of motors are running normally and lights flashing rule.
USE
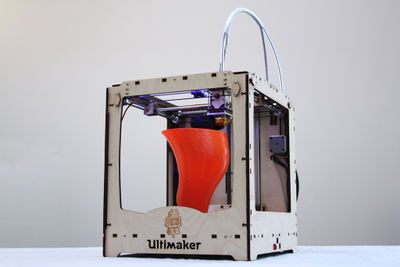
The Ultimaker board can use for many printer machines,such as Ultimaker
If you is a DIY user,you can follow the picture and the guide
Firmware
The Ultimaker board apply with MAGE, so it is most easy way uploading firmware from the IDE.
Steps to take:
- Close all programs that you use to communicate with your Ultimaker (RepG, Printrun, SendG, Netfabb, etc.)
- Connect your Ultimaker via USB to your computer. You don't need to turn on the red switch.
- Download and install the latest version of the Arduino IDE at http://arduino.cc/en/Main/Software (at the moment it's version 0022 and 0023).
- Download and extract the source code of the firmware (Marlin is better for Ultimaker ) you want to upload onto your Ultimaker.
Recommended source for Sprinter: https://github.com/bkubicek/Sprinter
Recommended source for Marlin: https://github.com/bkubicek/Marlin
Just decide for one of them and click "Downloads" and extract the archive.
Note: You can decide wether you want it to be archived as tarball or zip file. Zip will work on all major operating systems out of the box.
- Start Arduino
- Select your board (usually it's "Arduino Mega 2560", if you weren't amongst the first Ultimaker buyers).
- Do so by clicking: "Tools" -> "Board" -> "Arduino Mega 2560"
- Click "Open" (It's the upwards facing arrow icon).
- Select the firmware file from the extracted archive.
- In the case of Sprinter (given you got your source code from the link provided above): Tonokip_Firmware.pde
- In the case of Marlin (given you got your source code from the link provided above): Marlin.pde
- Click "Verify" (It's the very first play icon).
- Completion is indicated by 'Done compiling.'
- Click the "Upload" button (It's the right sides arrow icon).
Note: DON'T detach your Ultimaker during this step. Please wait until the completion is displayed in the status bar. If you detach the USB cable during
the upload procedure you risk to leave the board behind without a working firmware!
After the successful upload you can close Arduino and start up your control program of choice (RepG, Printrun, etc.).
In the case of RepG you have to this: In the menu, go to "Machine" -> "Driver" -> click "Ultimaker v1.0 (EXPERIMENTAL Sprinter firmware)".
NOTE: If you don't see the Sprinter profile do this: Open "Preferences" ->Activate "Show experimental machine profiles".
Restart RepG afterwards to see the change.
In the case of Printrun you have to make sure that you're using the correct baud rate: 115200
Carefully check all important functions like temperature control, endstops, etc. for proper function before you start any unattended print jobs!
You're done. Happy (s)printing or even better: printing with Marlin!
warning
If you use double extruder heads and select Marlin , you must know there is a mistake in "Pin.h" of Marlin ,the "#define EXTRUDER_1_ENABLE_PIN 51"
should be "#define EXTRUDER_1_ENABLE_PIN 48".
Documents:
Test for Arduino MEGA Ultimaker Shield.pde
Arduino MEGA Ultimaker Shield Sch.pdf
How to buy
Click here:http://www.geeetech.com/mega-ultimaker-shield-board-p-668.html


