Difference between revisions of "Melzi V2.0"
(→Interface specifications) |
(→Interface Connecting and Setting) |
||
| Line 59: | Line 59: | ||
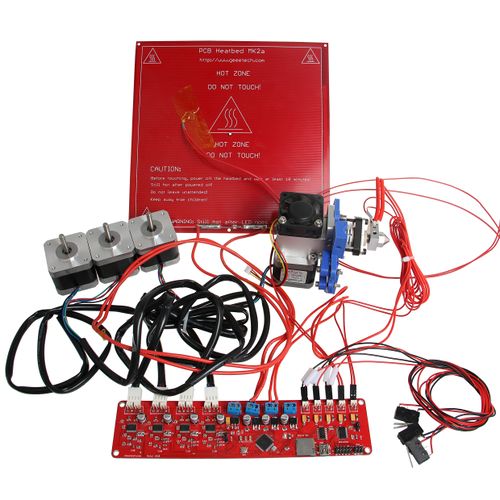
===Interface Connecting and Setting=== | ===Interface Connecting and Setting=== | ||
| − | [[File:Melzi enviroment.jpg]] | + | [[File:Melzi enviroment.jpg|500px|]] |
===File Burning=== | ===File Burning=== | ||
Revision as of 03:29, 21 August 2014
Contents
Introduction
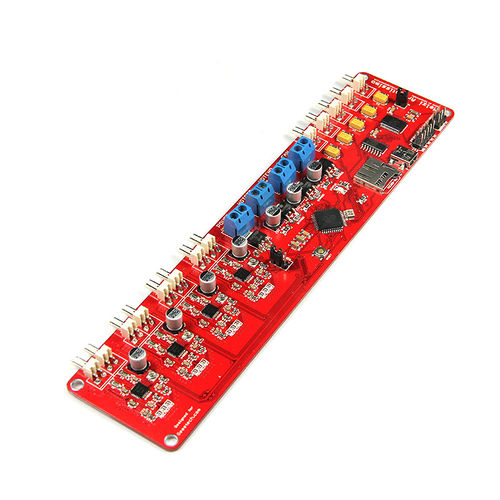
Melzi V2.0 is a compact all-in-one control board which supports only one extruder. Its plug-and-play capability contributes to less time consuming for development and installation. Melzi V2.0 is a quiet mature product with good stability. Melzi 2.0 is based on Arduino Leonardo, so it is more accurate in temperature detection. MelziV2.0 has the following amelioration compared with V1.0: the MOSFET of heatbed and extruder have better capacity of heat dissipation; SD slot adopts outer lead bonding, improving the stability of reading and writing, protecting sd car from damage. When connected to PC, the LED will give prompts for users to know the connection.
Features: 1. Operating voltage: 12v
2. Main control IC: ATMEGA1284P from ATMEL
3. FT232RL USB interface
4.4 integrated A4988 stepper motor driver
5.MK1、MK2a、MK2b、MK3 controllable hotbed MK1、MK2a、MK2b、MK3
6. Mini SD card slot that integrates G code files.
7. The integration of 3 MOSFET driver amphenol connectors for hotbed, fan and extruder.
Interfaces
Overview and Hardware Resources
Size :210mm *50mm Weight:70g
Software Resources
Compiling environment: Arduino IDE http://www.geeetech.com/wiki/images/3/36/Arduino-1.0.5-r2-windows.zip
Firmware: Marlin http://www.geeetech.com/wiki/images/3/39/Marlin-Marlin_v1.zip
Pc software:
printrun http://www.geeetech.com/wiki/images/e/e1/Printrun-Win-Slic3r-10Mar2014.zip
Repetier-Host http://www.geeetech.com/wiki/images/3/36/SetupRepetierHost_1_00.zip
Interface specifications
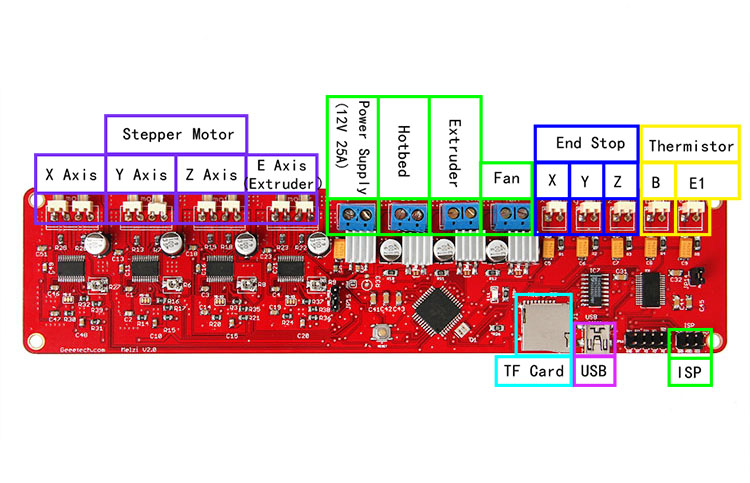
1 ADC interfaces for thermometry: one for extruder and another for hotbed.
2 PWM to control extruder, hotbed and fan.
3 end stops for x/y/z axis (mechanical).
Jumper Instruction
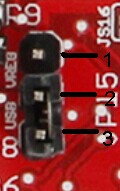
Power supply of logic part: connect 1 and 2 for external power supply; connect 2 and 3 for power supply from USB.
Development Environment setting
Interface Connecting and Setting
File Burning
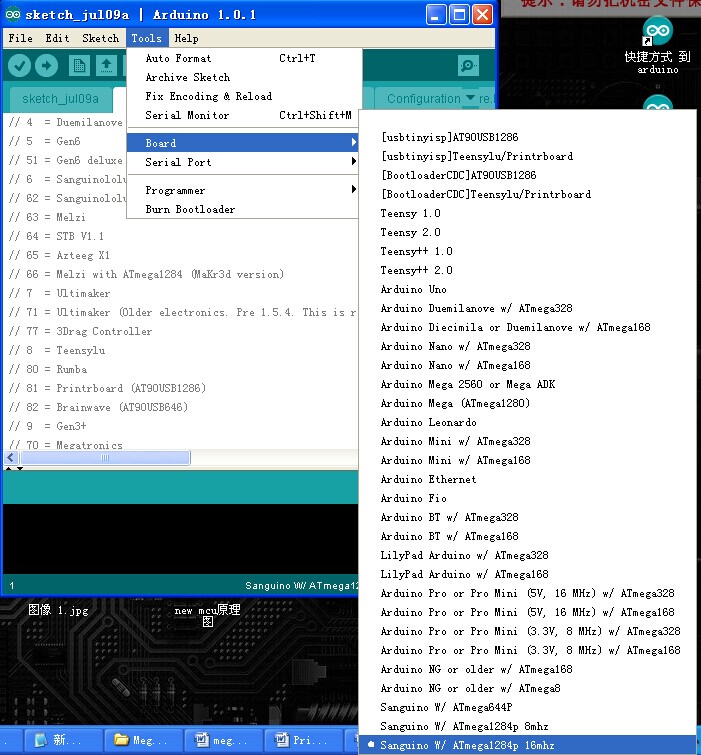
Windows users need install driver before uploading. The board: Tools > Board > sanguino W/ATMEGA1284P 16, as shown below.
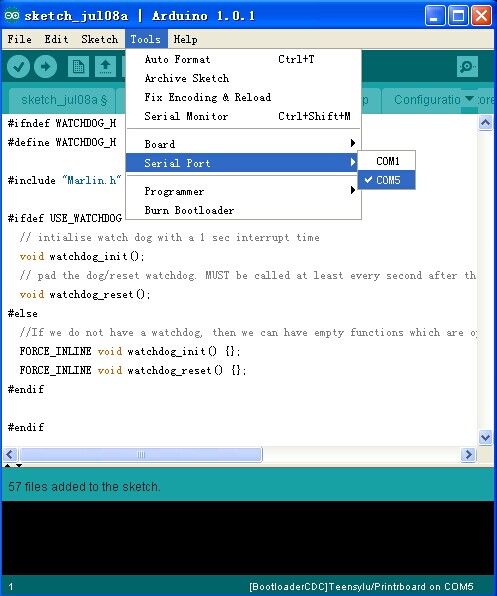
Configuring serial interface: Tools > Serial Port > the corresponding COM Port of MElzi V2.0 is usually the last one. As shown below
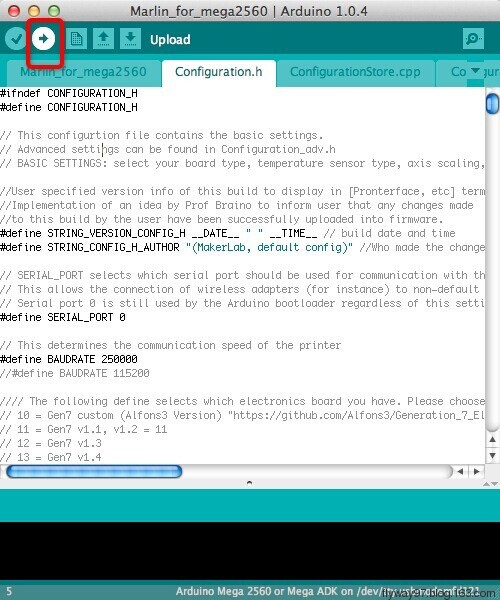
Click the check“ File:Button 1” button to check if it is right and then click the “File:Button 2 ” button to upload firmware, as shown below.
Upon uploading, IDE will display the rate of progress; when done uploading appears, the uploading process succeeded.
