Difference between revisions of "Brainwave Reprap Controller"
From Geeetech Wiki
(→Instructions) |
(→Features:) |
||
| (10 intermediate revisions by the same user not shown) | |||
| Line 1: | Line 1: | ||
=== Description === | === Description === | ||
| + | |||
| + | [[File:Brainwave2.jpg ]] | ||
Brainwave is a low cost controller for Reprap 3D printers derived from the well known Sanguinololu. The primary design goal was lower cost, achieved by providing only the minimum required components for a single extruder printer. It can be used to drive a cartesian or delta style printer. | Brainwave is a low cost controller for Reprap 3D printers derived from the well known Sanguinololu. The primary design goal was lower cost, achieved by providing only the minimum required components for a single extruder printer. It can be used to drive a cartesian or delta style printer. | ||
| Line 9: | Line 11: | ||
* Micro USB connector | * Micro USB connector | ||
* All connectors at edge of board, vertical or right-angle connectors will fit. | * All connectors at edge of board, vertical or right-angle connectors will fit. | ||
| − | * Atmel | + | * Atmel AT90USB1286-AU microcontroller w/ USB bootloader |
* 1, 2, 16 or 32x microstepping @ up to 800mA | * 1, 2, 16 or 32x microstepping @ up to 800mA | ||
* Dual Z-axis connectors | * Dual Z-axis connectors | ||
| Line 18: | Line 20: | ||
=== Instructions === | === Instructions === | ||
| + | |||
| + | [[File:Brainwave1.jpg ]] | ||
# Build, | # Build, | ||
| Line 68: | Line 72: | ||
* It may take a couple of presses of the RESET button to get the firmware to come up after flashing. | * It may take a couple of presses of the RESET button to get the firmware to come up after flashing. | ||
* You may need a thermistor or similar 100k resistance present across the bed and extruder thermistor inputs. Otherwise Marlin may go into a deathloop and you'll never even see a serial device. Even if it doesn't fall on its face it will only sit and complain about too high temp. | * You may need a thermistor or similar 100k resistance present across the bed and extruder thermistor inputs. Otherwise Marlin may go into a deathloop and you'll never even see a serial device. Even if it doesn't fall on its face it will only sit and complain about too high temp. | ||
| + | |||
| + | === Files === | ||
| + | |||
| + | '''Brainwavesilk:'''[[File:Brainwavesilk1.pdf]] | ||
| + | |||
| + | '''Schematic:'''[[File:Brainwave.pdf]] | ||
| + | |||
| + | '''Brainwave wiring diagram:''' | ||
| + | |||
| + | [[File:Brainwave_wiring_diagram_preview_featured.jpg]] | ||
| + | |||
| + | == How to buy== | ||
| + | Click here to buy [http://www.geeetech.com/brainwave-reprap-controller-p-681.html Brainwave Reprap Controller] | ||
Latest revision as of 02:16, 18 June 2014
Contents
Description
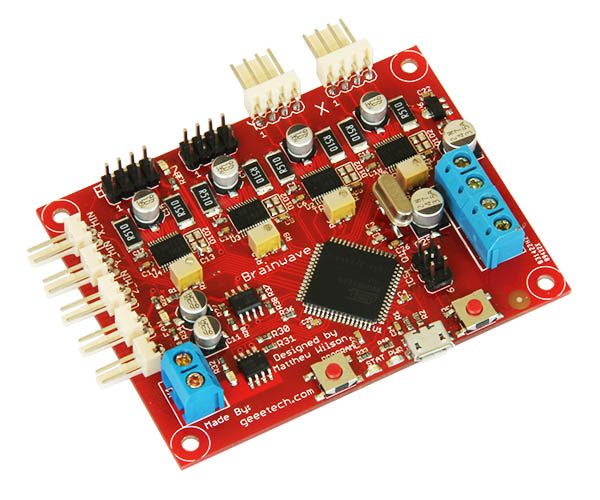
Brainwave is a low cost controller for Reprap 3D printers derived from the well known Sanguinololu. The primary design goal was lower cost, achieved by providing only the minimum required components for a single extruder printer. It can be used to drive a cartesian or delta style printer.
Features:
- Small footprint: only 60mm x 79mm!
- 12V power input
- Micro USB connector
- All connectors at edge of board, vertical or right-angle connectors will fit.
- Atmel AT90USB1286-AU microcontroller w/ USB bootloader
- 1, 2, 16 or 32x microstepping @ up to 800mA
- Dual Z-axis connectors
- Optional per channel current attenuation
- Heated bed support with separate power input (up to 24V @ 15A)
- Integrated heater/thermistor/stepper connector for E channel
- Fan control
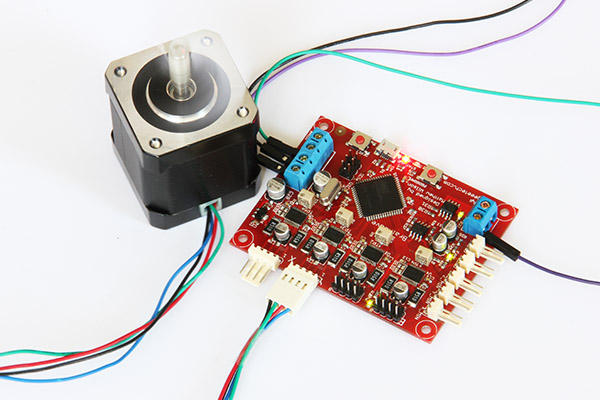
Instructions
- Build,
- Install Arduino 1.0.2
- install the brainwave arduino hardware bundle from [1] into the Arduino hardware directory.
- Get Marlin. I am maintaining a branch of Marlin that will compile for brainwave at [2] HEAD has support, but it doesn't always compile cleanly for this board.
Hardware configuration
- Set micro-stepping selector jumpers (D1, D2) per channel as follows. Short both for 32x microstepping. Default: single-step.
- Set stepper current reference voltages. I = V / 2.55. Default: 1V == 400mA.
Step Mode D1 D2 Mode 0 0 Full 1 0 Half 0 1 16x 1 1 32x
Software configuration
- Open Arduino, find the Marlin directory and open Marlin.ino.
- Select 'Brainwave' from the Board menu. Find the Configuration.h file and change DEFAULT_AXIS_STEPS_PER_UNIT to suit your printer (remember, 32x microsteps!)
- Power on the Brainwave and connect the USB cable (note: the brainwave will not power up off USB, you need the 12V supply.)
- Hold down the PROGRAM button and press RESET, the STATUS led should pulse.
- Press the Upload button in Arduino.
- After a reset the brainwave will show up as a CDC ACM serial device (/dev/ttyACM[0..9] on Linux) and be ready to accept commands.
Brandon Bowman wrote up an excellent guide for getting the board working under Windows and MacOS: [3]
Known issues
- It may take a couple of presses of the RESET button to get the firmware to come up after flashing.
- You may need a thermistor or similar 100k resistance present across the bed and extruder thermistor inputs. Otherwise Marlin may go into a deathloop and you'll never even see a serial device. Even if it doesn't fall on its face it will only sit and complain about too high temp.
Files
Brainwavesilk:File:Brainwavesilk1.pdf
Schematic:File:Brainwave.pdf
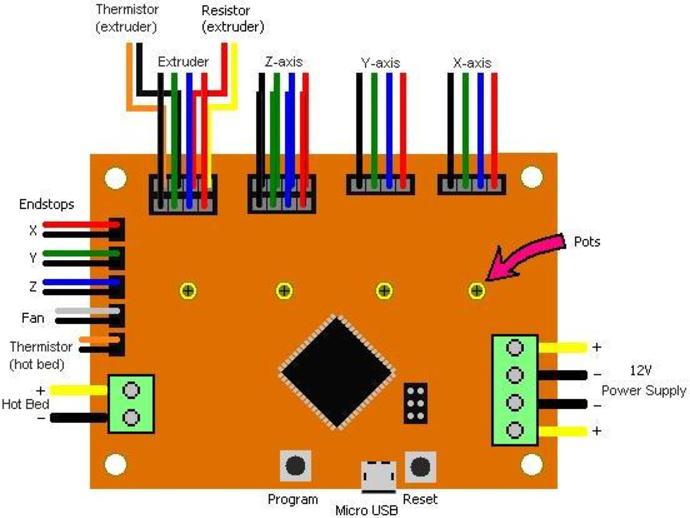
Brainwave wiring diagram:
How to buy
Click here to buy Brainwave Reprap Controller


