Difference between revisions of "Burnning BIOS into Tiny6410"
(Created page with "==boot mode selection== The boot mode of Tiny6410 is selected by the toggle switch S2, according to the symbol near the toggle switch S2. <br> System will be booted from SD ...") |
(→Burn BIOS based on Windows7) |
||
| Line 61: | Line 61: | ||
Superboot can’t be seen after its been burned in SD card. How can we detect it? Plug the SD card into the development board and set the switch S2 to “SDBOOT” side. After power-on, the flickering Led1 indicates the superboot working. If the LED1 doesn’t flash or no output show in serial monitor, it means the burning failed. | Superboot can’t be seen after its been burned in SD card. How can we detect it? Plug the SD card into the development board and set the switch S2 to “SDBOOT” side. After power-on, the flickering Led1 indicates the superboot working. If the LED1 doesn’t flash or no output show in serial monitor, it means the burning failed. | ||
| + | |||
| + | For booting Tiny210 development board via SD card, you need to use SD-Flasher to burn Superboot-210 into SD card(located in images/Superboot210.bin)<br> | ||
| + | |||
| + | Superboot can be burn into SD card or Nand Flash , because it is capable of identifying SD card boot and Nand Flash boot. | ||
| + | |||
==Burn BIOS based on Windows7== | ==Burn BIOS based on Windows7== | ||
Latest revision as of 08:26, 6 July 2012
Contents
boot mode selection
The boot mode of Tiny6410 is selected by the toggle switch S2, according to the symbol near the toggle switch S2.
System will be booted from SD card when S2 is toggled to SDBOOT side;
System will be booted from Nand Flash when S2 is toggled to NAND side;
Instruction: The S3C6410 chip support many boot modes: Nor Flash, normal Nand Flash, OneNand, SD/MMC Card, even Modem(reference 6410 datasheet table3-1 ),but we only set the “Nand Flash” and “SD/MMC” based on ease of use.
external interface
- Please use the direct serial port cable we provide to connect serial port 0 on 6410 with PC serial port.
- Please use the crossed network cable we provide to connect network interface on 6410 with PC
- Please use the 5V power adapter we provide to connect the power jack on 6410
- Please plug the headphone or speaker jack in the audio output socket (green).
- If you have a LCD display, please connect it to LCD interface on Tiny6410 following the direct of the dataline.
- Please use USB cable to connect 6410 with PC.
Hyper terminal setting
Please refer to http://www.geeetech.com/wiki/index.php/Mini2440%E2%80%98s_settings_and_connections
Burn the BIOS to SD card
The blank SD card can’t boot 6410 development board, the BIOS must be burned into the SD card using the specific burning application and the BIOS cannot be directly seen on your computer. SUMSUNG has provided such burning application that most of the 6410 development board use by now: IROM_SD_Fusing_tool.exe, you can find the source code in the CD-ROM. Owing to its limitation and insecurity, Friendly Arm develop another application SD-Flasher.exe, more secure and powerful.
BIOS intro
U-boot
SUMSUNG has provided the U-boot with USB download function for 6410 system, Friendly ARM improves its function and open source for the benefit of embedded hobbyist. The feature is below;
- add the download menu as superboot USB download menu
- add the SD card boot configuration
- support burning yaffs2 file system image
- support Nboot for burning WindowsCE Bootloader
- support burning WindowsCE imge
- support burning singe file image
- support returning to shell
Superboot
in addition to the open source U-boot, for enterprises, we have also designed the powerful Superboot which can be burned to SD card. Because the function menu and order of Tiny6410 is almost same as Mini2440, it is handy to use its USB download function on Mini6440 even without installing the USB driver and DNW application.
Superboot also support installing and running system with SD card. With no USB and DNW needed, you are able to install and run a variety of systems with modifying the configuration file.
In addition, you don’t need to worry about your computer system is WindowsXP, Vista , windows7, even 64-bit Windows7, SD-flasher could work with them.
Burn BIOS based on WindowsXP
Note: Some customer report that some SD reader build in Notebook can’t work, in this case, you can try to use the common USB reader.
in addition, SD-Flasher will partition 130M for free space at least, as a result , some SD card less that 256M can’t work, we recommend the 4GB SD card at least, because the image file is quite large.
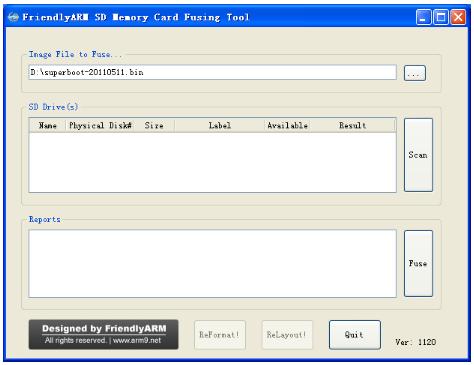
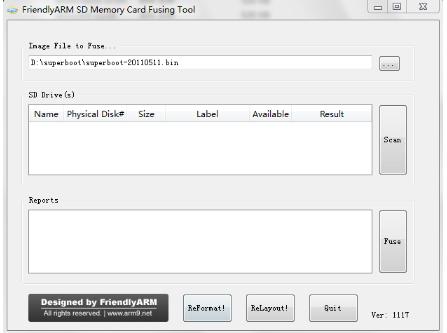
Step1;Run the SD-flasher.exe located in \tools\ in the CD-ROM, please note the “Relayout” and “Reformat” button is invalid, we disable the function in windows XP.
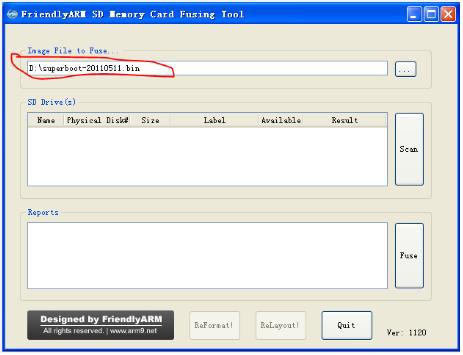
Step2: find the superboot located in CD:/images
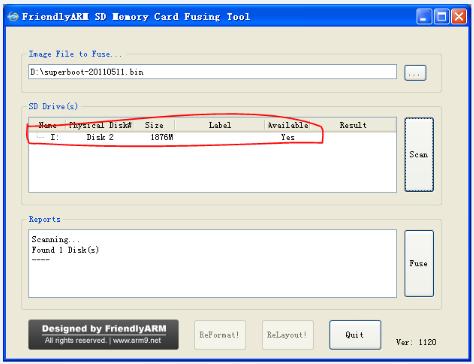
Step3: Put the FAT32 format SD card in SD card reader, then click “Scan”, the SD card founded will be listed.
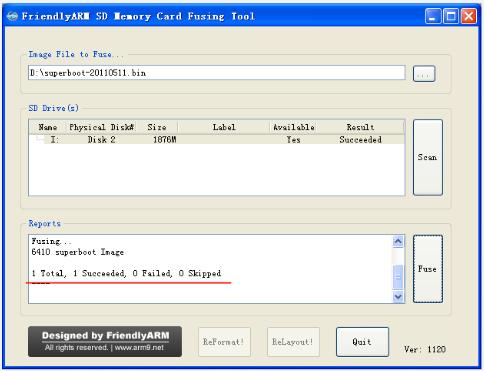
Step4:Click “Fuse”, the superboot will be burned in SD card.
Superboot can’t be seen after its been burned in SD card. How can we detect it? Plug the SD card into the development board and set the switch S2 to “SDBOOT” side. After power-on, the flickering Led1 indicates the superboot working. If the LED1 doesn’t flash or no output show in serial monitor, it means the burning failed.
For booting Tiny210 development board via SD card, you need to use SD-Flasher to burn Superboot-210 into SD card(located in images/Superboot210.bin)
Superboot can be burn into SD card or Nand Flash , because it is capable of identifying SD card boot and Nand Flash boot.
Burn BIOS based on Windows7
Step1: Run the SD-flasher.exe located in \tools\ in the CD-ROM, please note you need to run it as administrator.
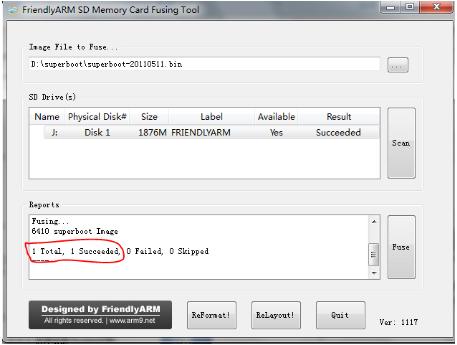
As the photo below, please note the ”Relayout” button is valid now. We will partition SD card via it so as to read or write safely.
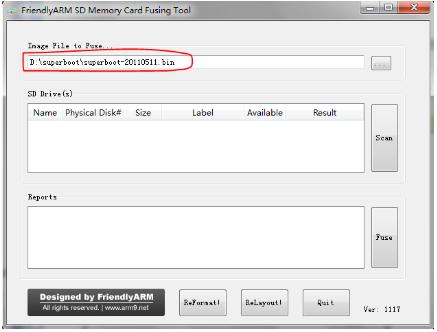
Step2: find the superboot located in CD:/images
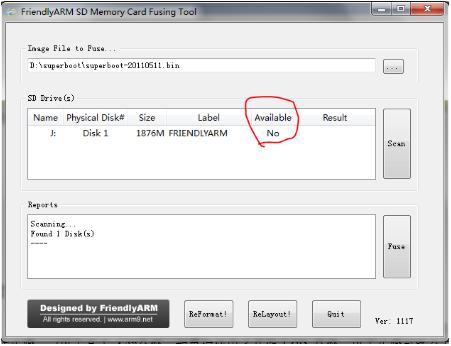
Step3: Put the FAT32 format SD card into SD card reader and backup the data in SD card. Then click “”Scan” the SD card founded in the list is not available.
Step4:Click “ReLayout”, a message box pop up to prompt that the data in the SD card will lost. Click “Yes”, partition will start.
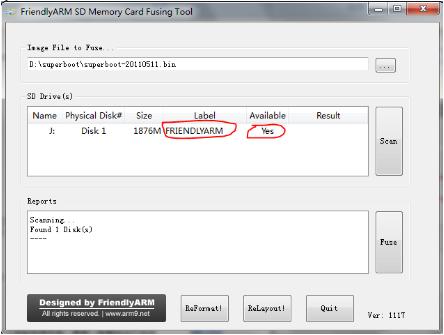
After partitioning is finished, please back to SD-flasher interface and click ”Scan” . The of SD card listed is available now and the volume label is “FriendlyArm”.
Step5: Click “Fuse”, Superboot will be burned to SD card unformatted section.
Superboot can’t be seen after its been burned in SD card. How can we detect it? Plug the SD card into the development board and set the switch S2 to “SDBOOT” side. After power-on, the flickering Led1 indicates the superboot working. If the LED1 doesn’t flash or no output show in serial monitor, it means the burning failed.
