Difference between revisions of "Serial I2C 1602 16×2 Character LCD Module"
(→Connection diagram) |
(→Contrast adjust) |
||
| Line 24: | Line 24: | ||
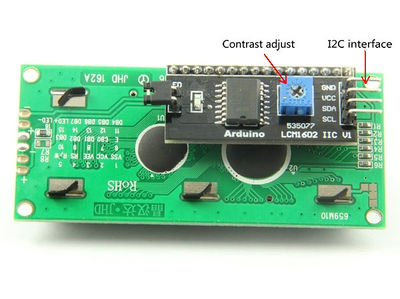
==Contrast adjust== | ==Contrast adjust== | ||
[[File:1602I2C 3.jpg|400px]] | [[File:1602I2C 3.jpg|400px]] | ||
| + | |||
| + | Spin the potentimeter clockwise to increase contrast ,spin unclockwise to decrease it | ||
==Example code== | ==Example code== | ||
Revision as of 03:17, 2 June 2012
Contents
Introduction
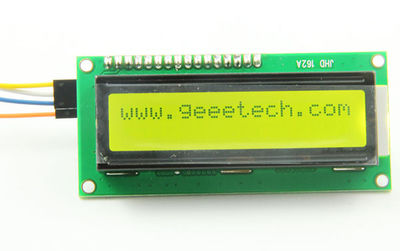
This is another great blue/yellow backlight LCD display. As the pin resources of Arduino controller is limited, your project may be not able to use normal LCD shield after connected with a certain quantity of sensors or SD card. However, with this I2C interface LCD module, you will be able to realize data display via only 2 wires. If you already has I2C devices in your project, this LCD module actually cost no more resources at all. It is fantastic for Arduino based project.
Features
- Interface: I2C
- I2C Address: 0x27
- Pin Definition : VCC、GND、SDA、SCL
- Back lit (Green with white char color)
- Supply voltage: 5V
- Size : 27.7mm×42.6mm
- Contrast Adjust : Through Potentiometer
- Only employ two I/O interface
Connection diagram
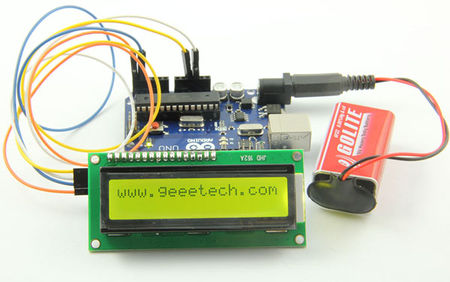
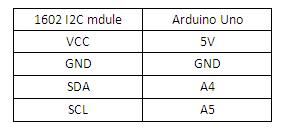
Here is pic shows how to connect an Arduino 1602 I2C module.The following is a table describing which pins on the Arduino should be connected to 1602 I2C LCD module.
Contrast adjust
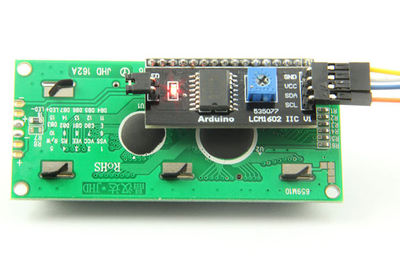
Spin the potentimeter clockwise to increase contrast ,spin unclockwise to decrease it
Example code
Download Arduino 1602 I2C library
#include <Wire.h>
#include <LiquidCrystal_I2C.h>
LiquidCrystal_I2C lcd(0x27,16,2);  // set the LCD address to 0x27 for a 16 chars and 2 line display
void setup()
{
 lcd.init();                      // initialize the lcd
 // Print a message to the LCD.
 lcd.backlight();
 lcd.print("Hello, world!");
}
void loop()
{
}
How to buy
Click here to buy Arduino Serial I2C 1602 16×2 Character LCD Module
